Photoshop Skin Retouching Tip: Make Details More Visible
Effective skin retouching is as much an art as it is a science. Experience and a lot of practice are what ultimately leads to consistently great results. One challenge is that skin blemishes and imperfections are not always easy to see, and as we stare at an image while retouching we can easily miss out on some of the skin details that would need retouching.
In this post, we'll go over a simple trick that can help with that by making details more apparent.
Before / After:
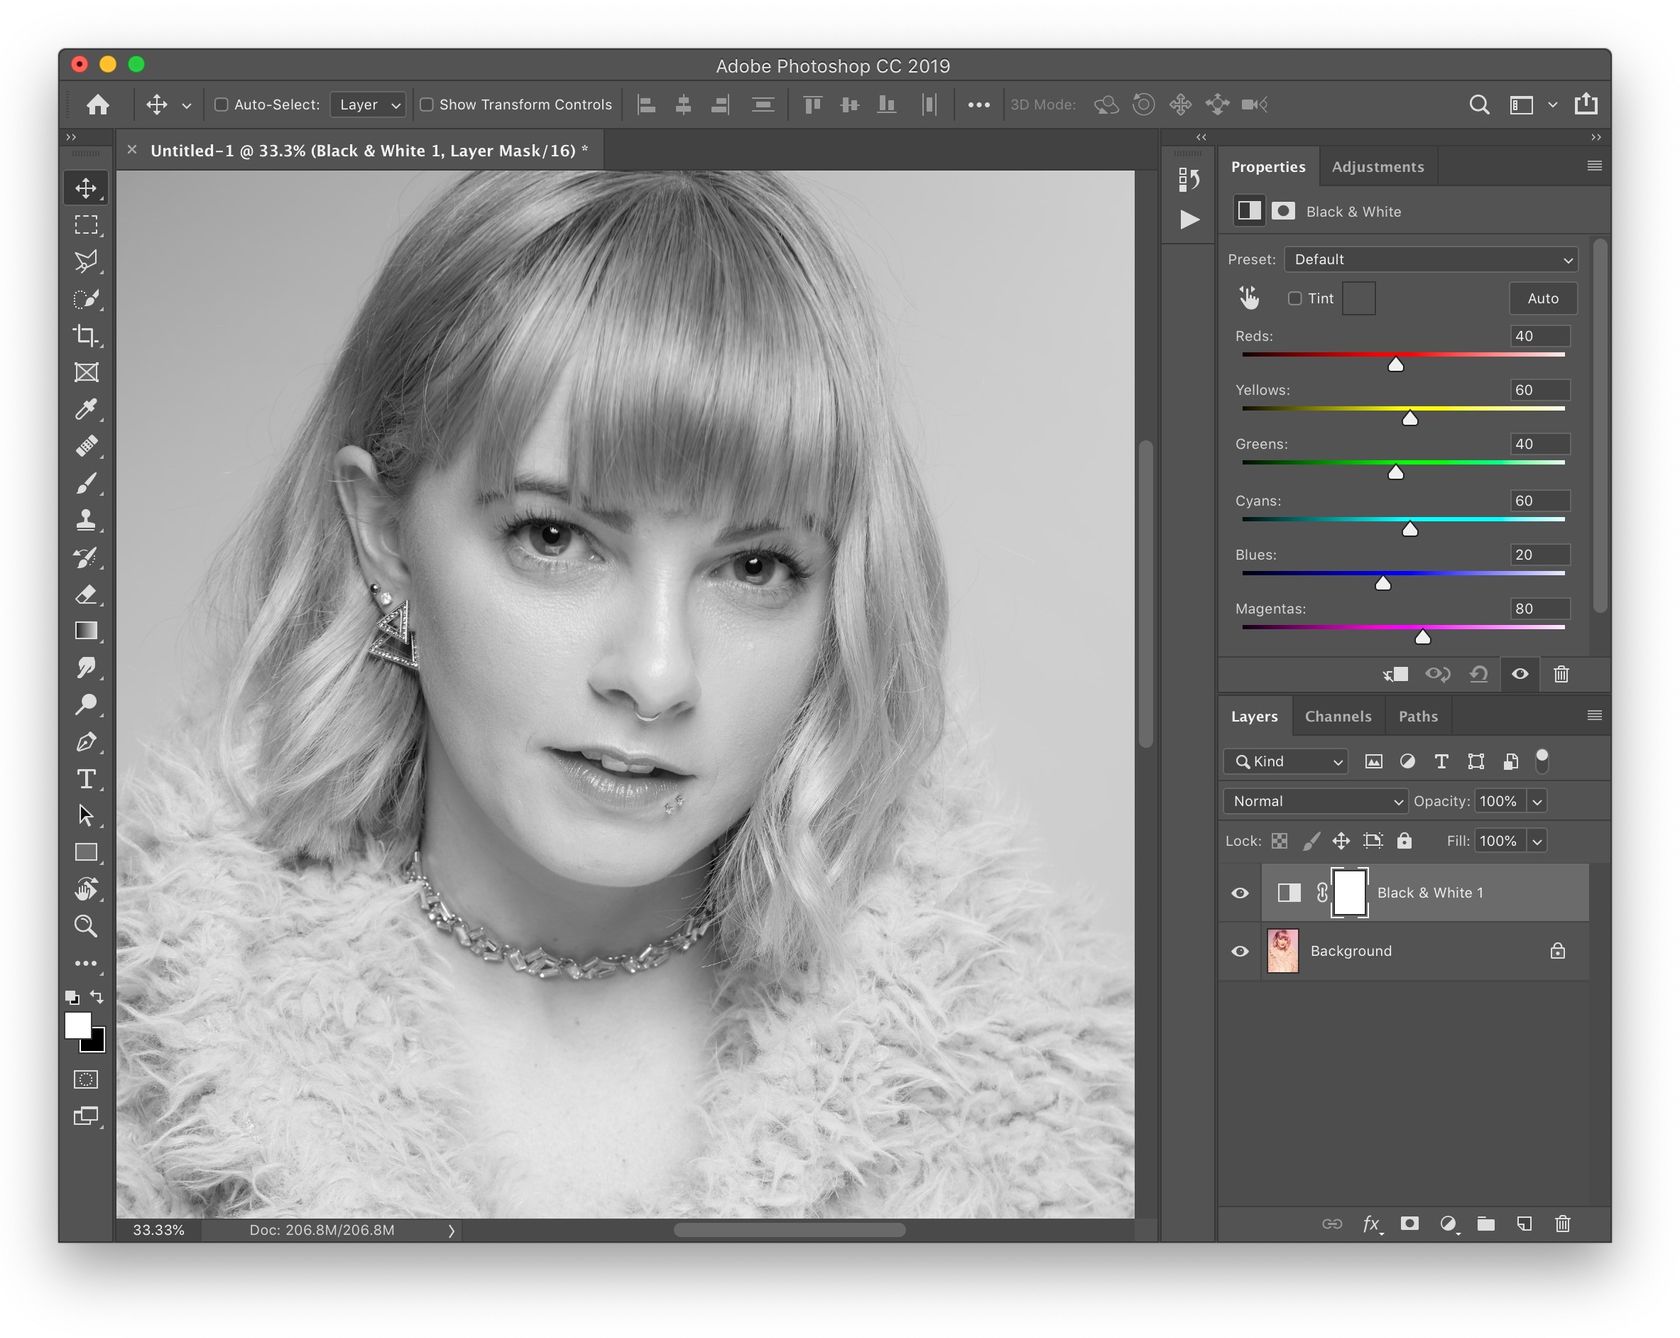
Black and White Adjustment Layer
First, add a Black and White adjustment layer and stick with the default settings. This will get rid of all the colors from the image and keep only the tonal values in the form of shades of gray.

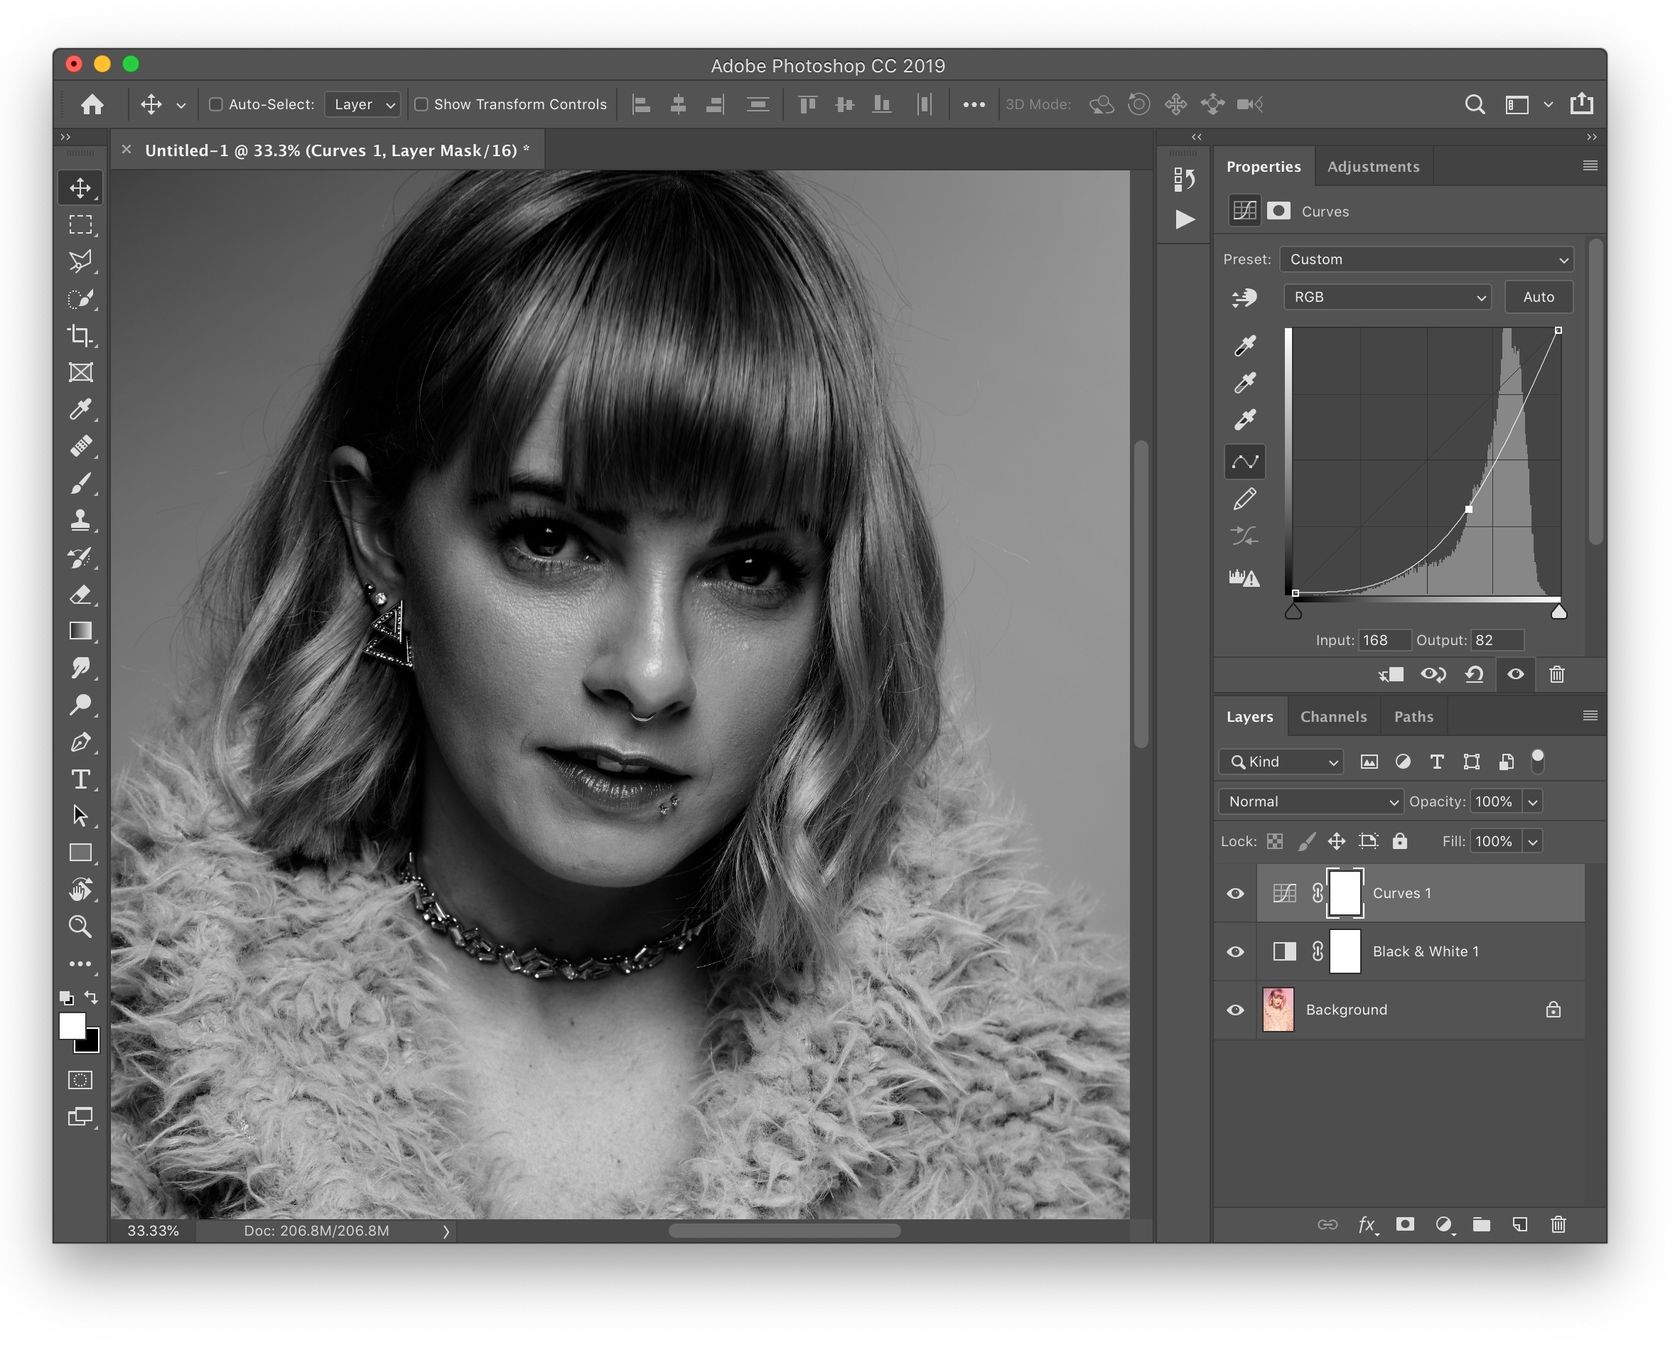
Curves Adjustment Layer
Next, add a Curves adjustment layer and either set it to a blend mode of Multiply or bring the curve down to darken the image. This will at the same time help bring out all the details in the image that would otherwise be to bright to notice or where the colors would create a visual diversion.

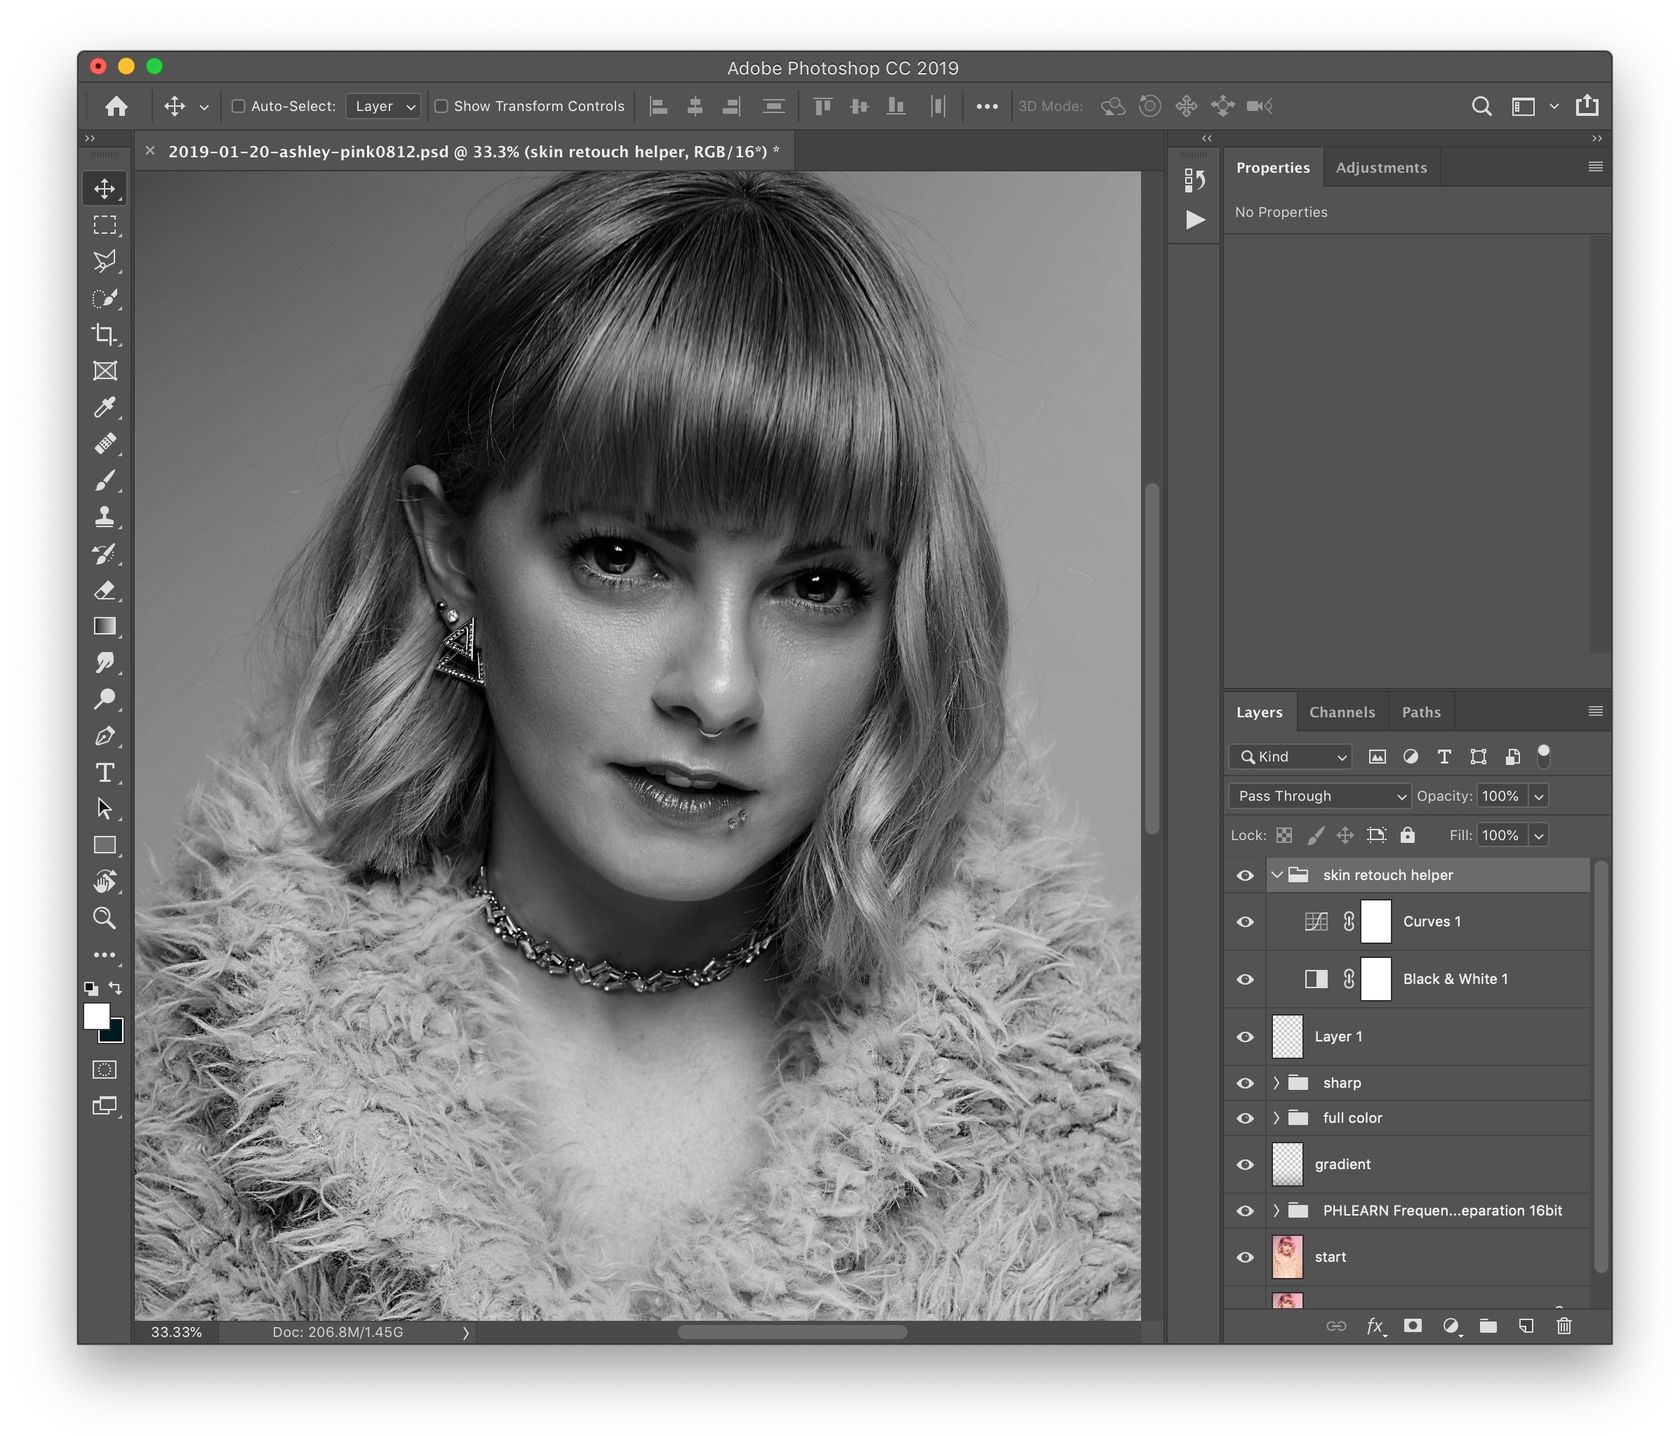
Do Your Normal Skin Retouching / Tonal Adjustments / Dodging & Burning
Now, under those 2 adjustments layers, you can proceed with your favorite skin retouching techniques (e.g.: frequency separation). Those two extra layers are especially great to help you see where color tones need to be evened out, or where local dodging and burning should be applied.

Once you’re done retouching the skin, just get rid of those 2 extra adjustments layers, they were just utilities to make your retouching life easier.
I’ve first learned about this technique from photographer Jake Hicks, and I’ve seen a version of the technique used by multiple other photographers since. I hope this post was helpful!
🌄 Image info:
- Camera: Nikon D800
- Focal length: 70mm
- Shutter speed: 1/250s
- Aperture: f/10
- ISO: 100