How to Add a Vignette in Adobe Photoshop
A darkening around the edges of a photo, known as a vignette, happens by default for certain lenses. With most modern lenses however, the inherent vignetting is very minimal, and sometimes we want to add our own vignette for creative effect. A vignette can also be a great way to help focus the attention on the subject of an image.
There are many ways to add a vignette. For example, a vignette can be added directly in Lightroom from the lens correction panel. When it comes to adding a vignette in Photoshop, one could draw a large circle and then apply a very large blur, or one can add a solid color adjustment and mask out the center. Another technique is to use a Curves adjustment layer to darken down the image and then mask out the center of the image.
The method using a Curves adjustment is what we'll use here to create a vignette around this shot of the Paul Smith building in Los Angeles. One of the benefits of using a Curves adjustment is that the darker colors in the edges will actually come from the colors of the photograph, so the result can look more realistic. Another benefit is that you get to define the exact shape of the vignette.
Before / After:
0- Getting Started
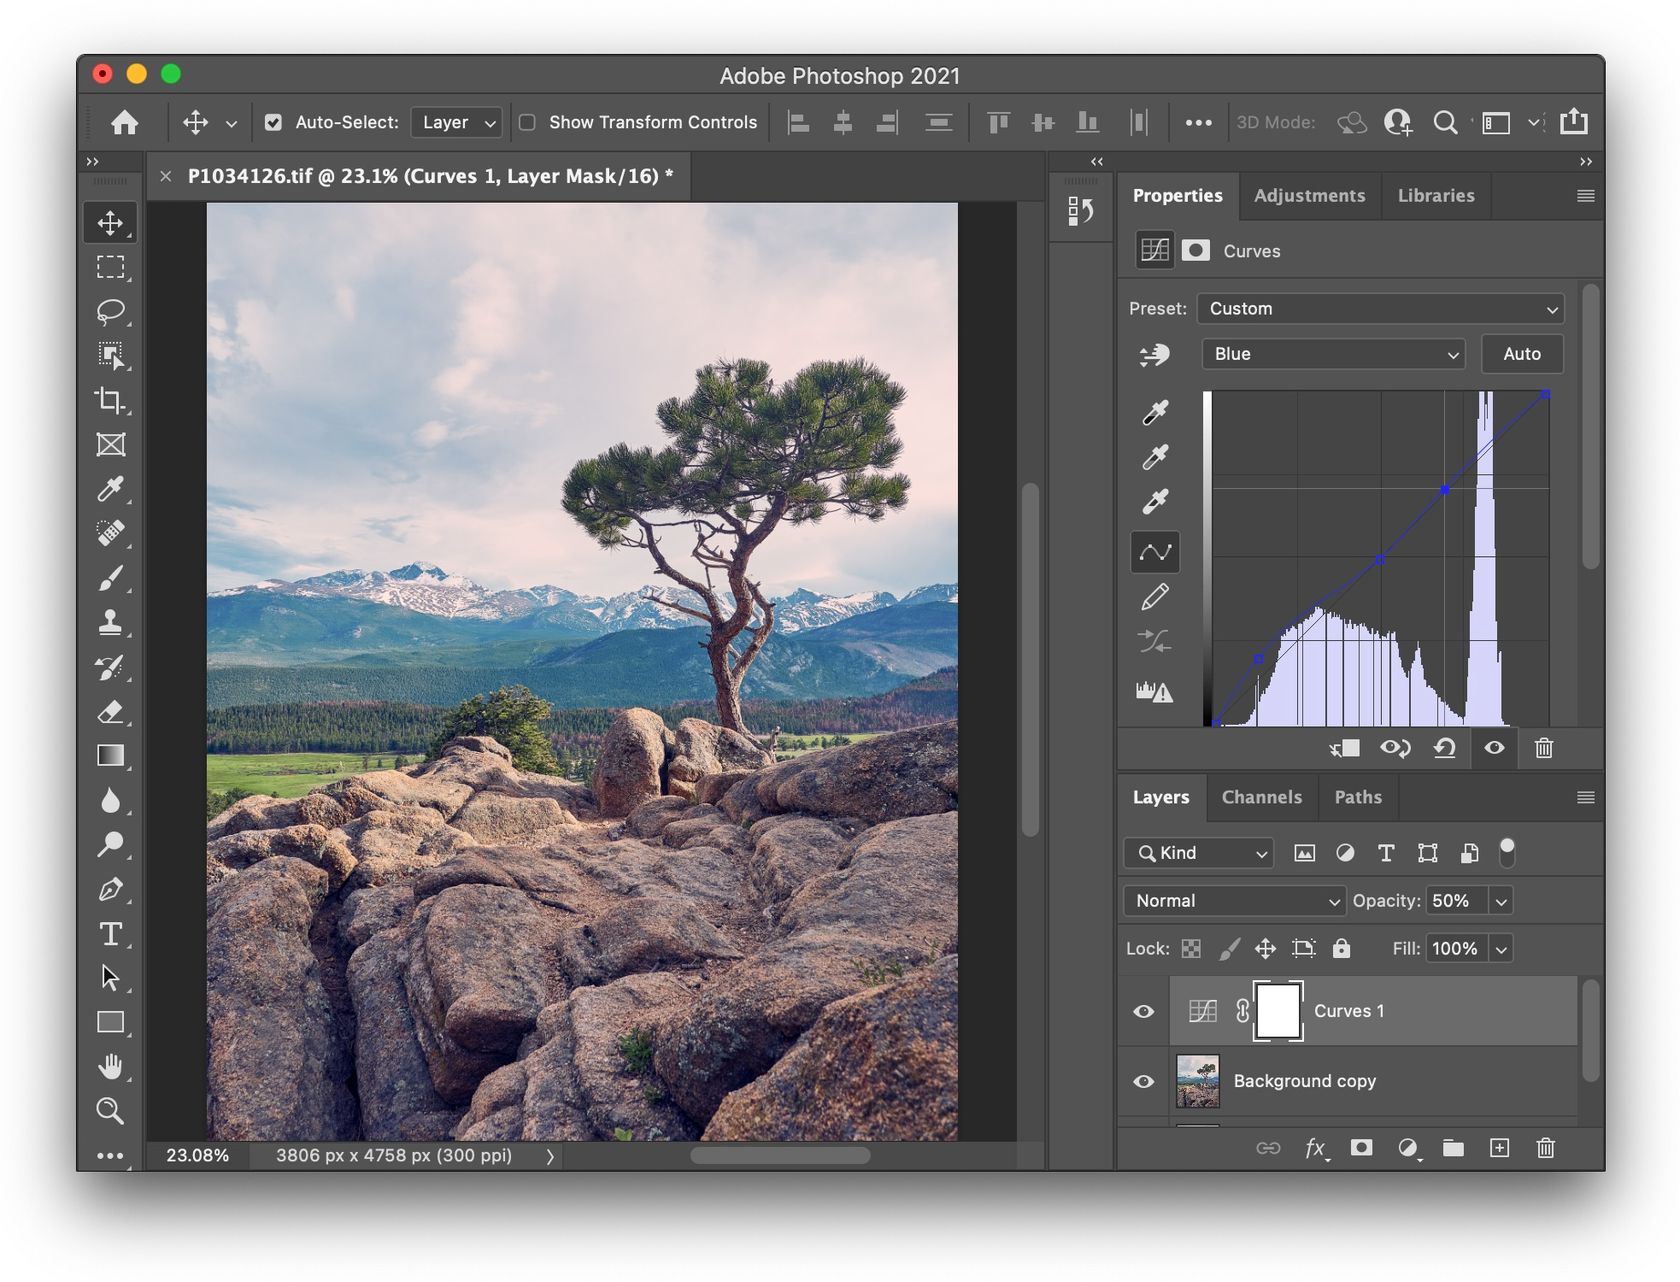
First of all, I decided to add some contrast to the image and remove some of the yellow tones from the image:
- For contrast, I duplicated my background layer, and set the duplicate to a blend mode of Soft Light.
- To remove the yellow from the image, it’s as simple as adding it’s opposite: blue. I added a Curves adjustment layer and, in the blue channel, I raised the curve a little, focusing on the shadows. This also adds a pleasing subtle bluish tone to the shadows.
1- Adding a Vignette with a Curve
Next up: adding the vignette!
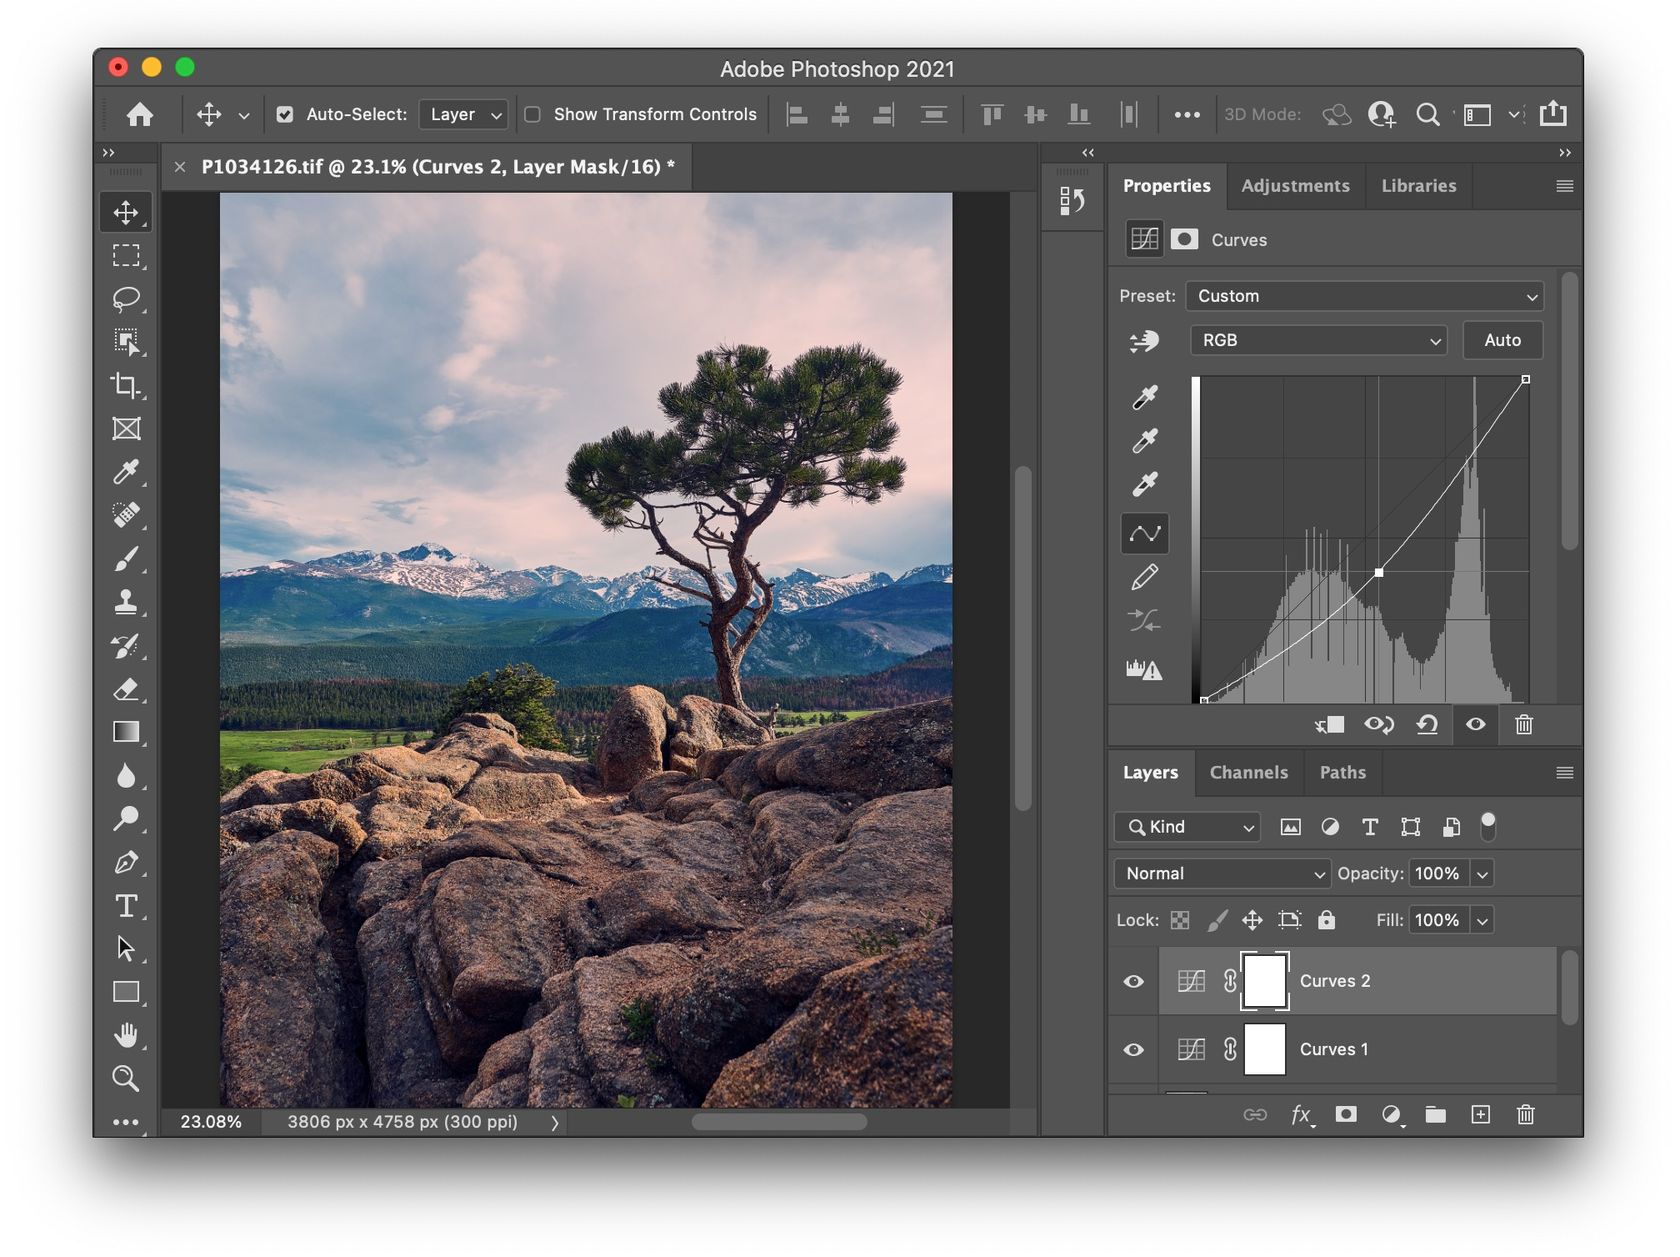
- Add another Curves adjustment layer.
- Darken down the whole image by pulling the curve down to an amount of darkening that looks right for the photo’s edges.
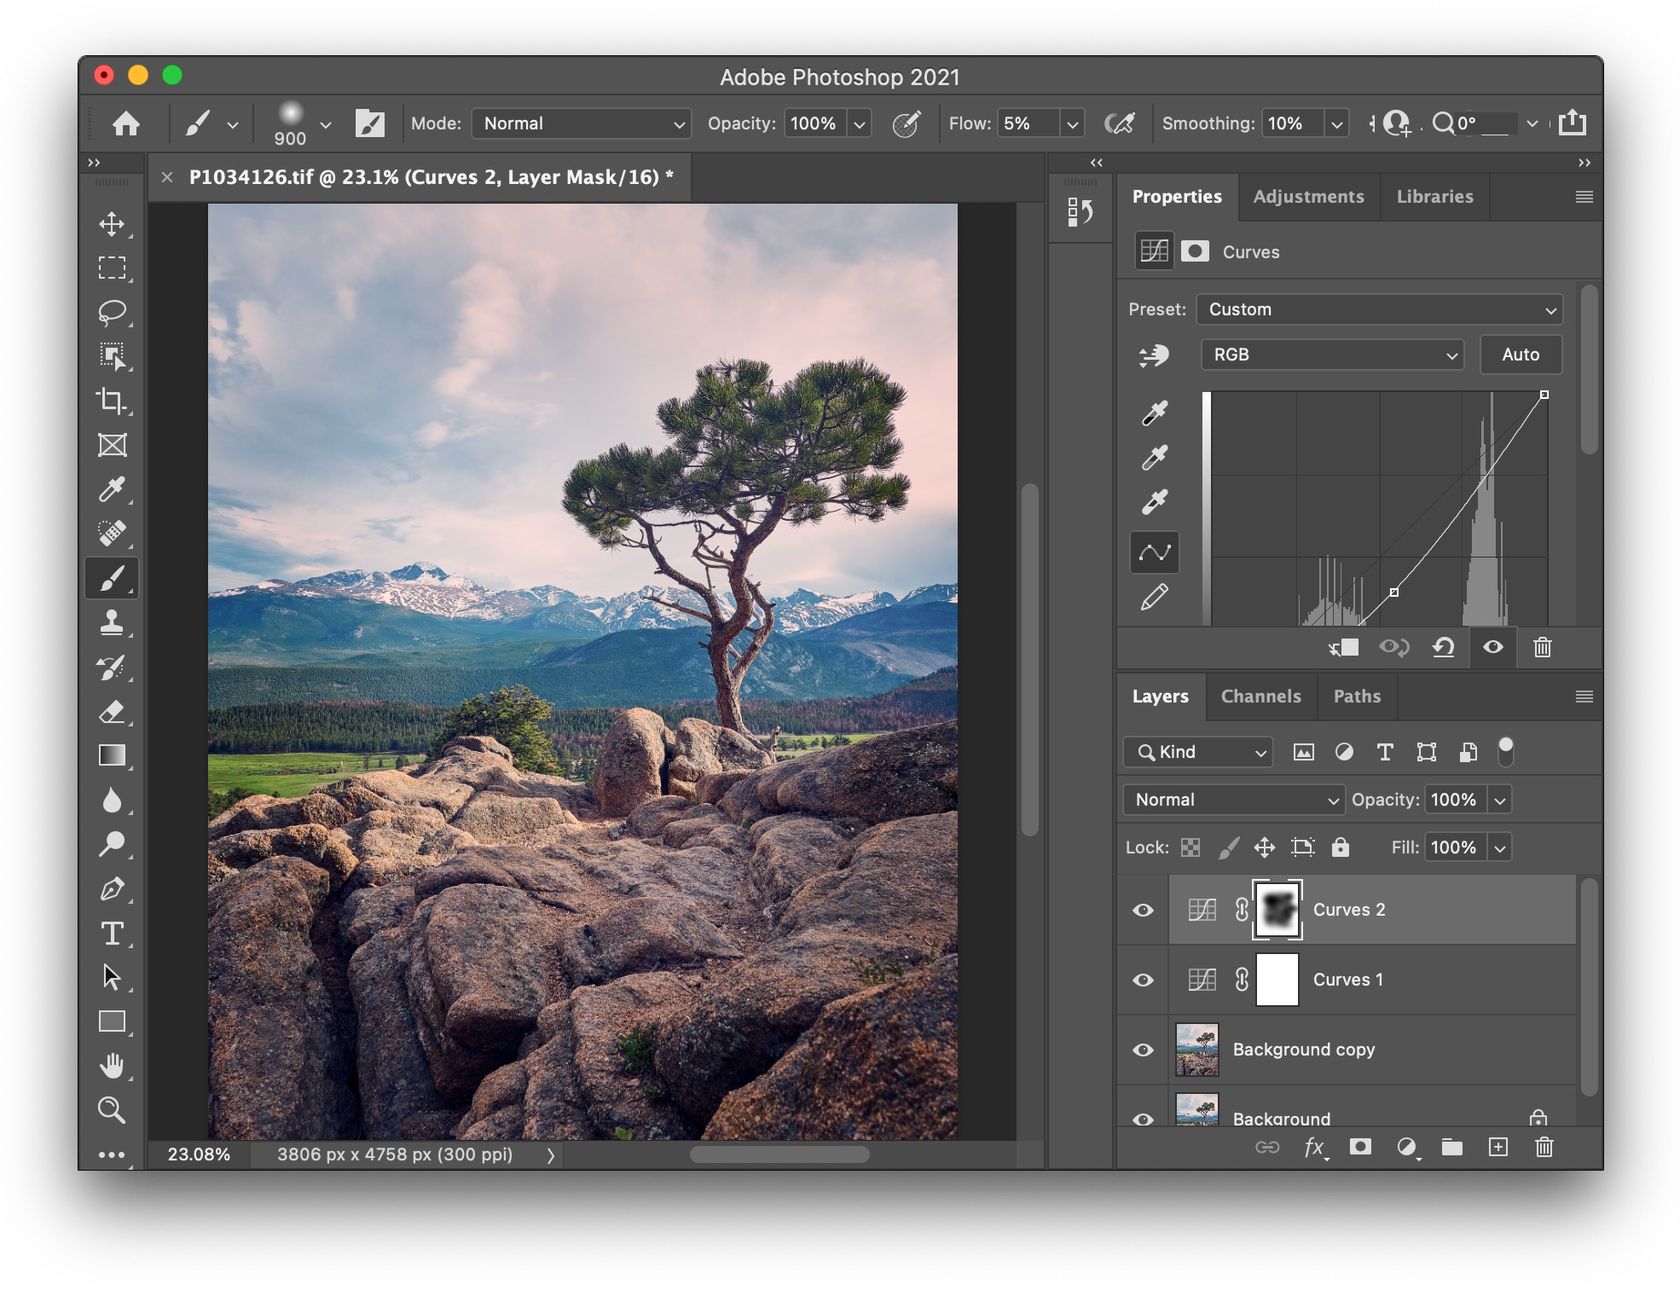
- Now use the brush tool B with a large soft black brush. You’ll also want to set the Flow for the brush pretty low, something like 5% should do.
- Slowly draw around the center of the image outwards to mask out the part of the image that shouldn’t be affected by the vignette. Since we’re using a low flow with our brush, you’ll have to iteratively draw over and over until the darkening/vignetting is only applied around the edges, or wherever you want it to apply.
And there you have it, a simple way to apply a vignette in Photoshop in no time flat! 💯
🌄 Image info:
- Camera: Lumix G9
- Focal length: 14mm
- Shutter speed: 1/250s
- Aperture: f/7.1
- ISO: 200


