How to Add Noise/Film Grain to Your Images in Photoshop
Most of the time you may find yourself trying to reduce the noise in an image. That's especially true if you were force to shoot in a very low light environment.
Once in a while though you'll be looking to do just the opposite of that; adding some noise or film grain after the fact. This helps give the image a vintage effect and impart a certain emotion to the image. Adding noise or film grain often looks especially great on black and white photographs, and this is exactly what we'll do with this current example.
And sometimes adding film grain is the best way to save a great image that's otherwise a little bit out of focus, making it a feature instead of a bug!
Before / After:
Adding a basic noise/film grain effect is really simple and only 2 steps are needed:
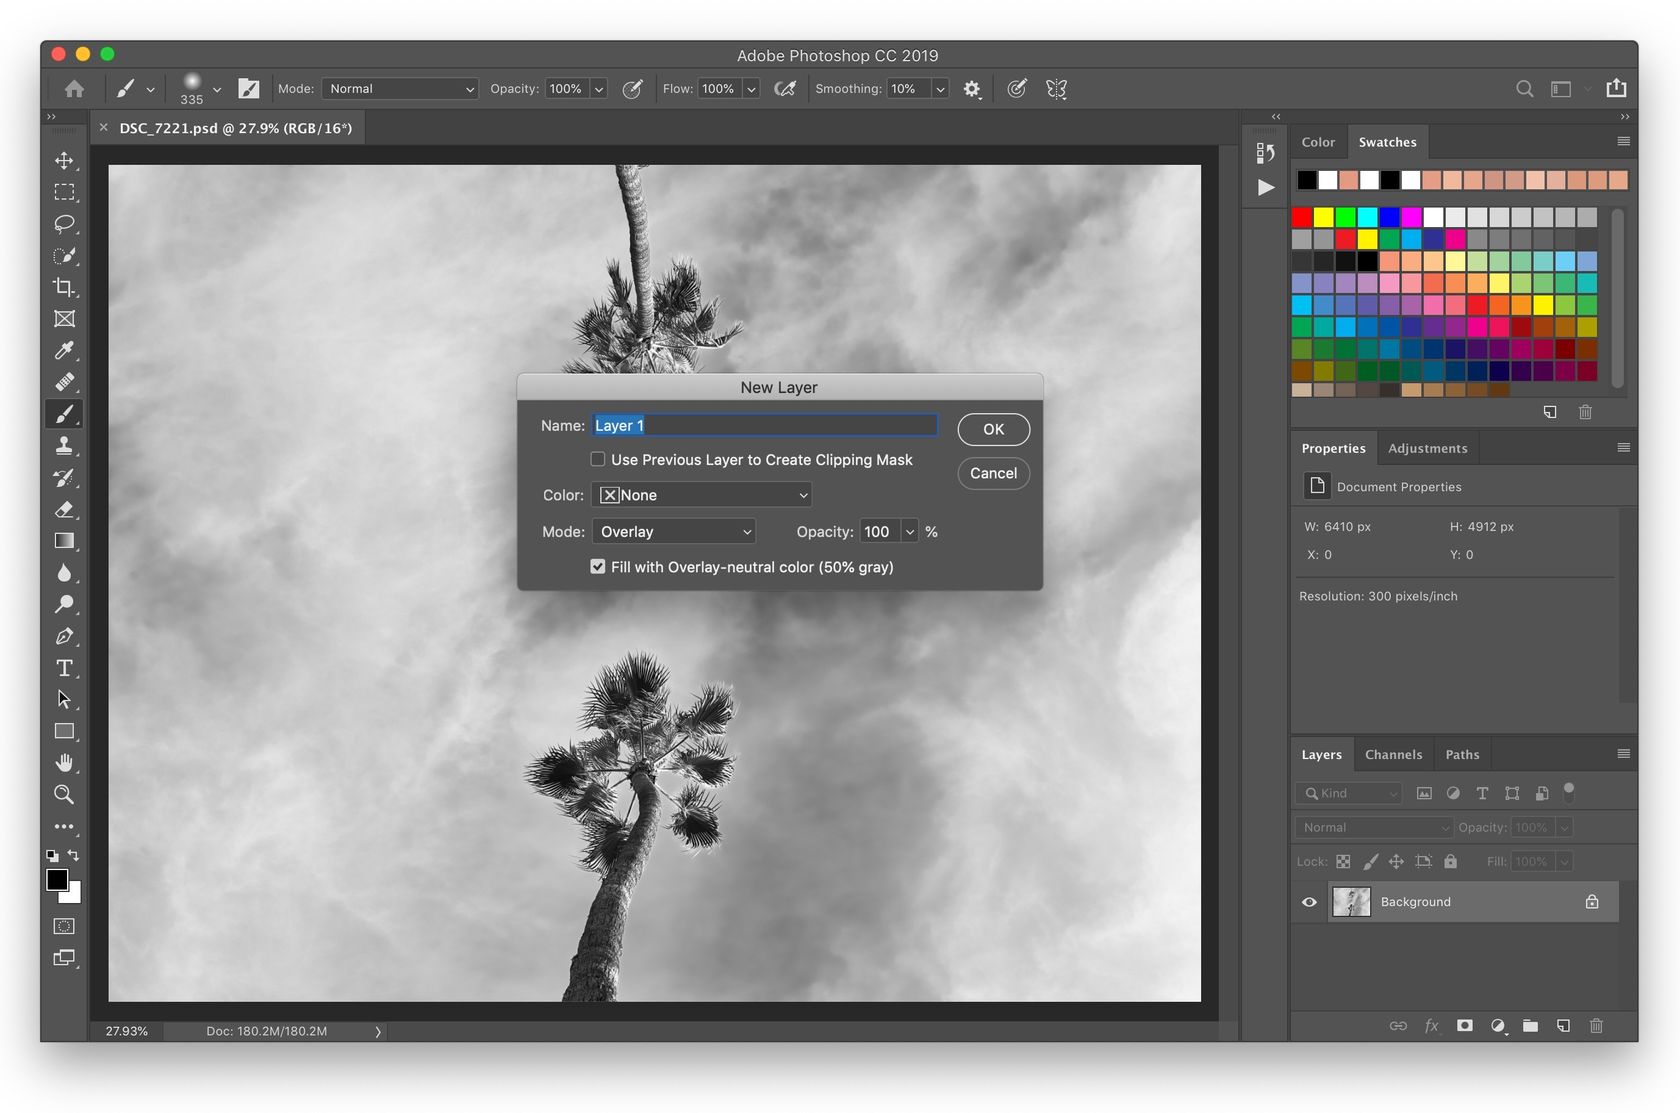
1- New Layer
Create a new layer (Shift+Cmd+N Shift+Ctrl+N) and choose a blend mode of Overlay and select the Fill with Overlay neutral color option.
Now you have a gray layer on top of your image, but you can’t see it, thanks to the Overlay blend mode.

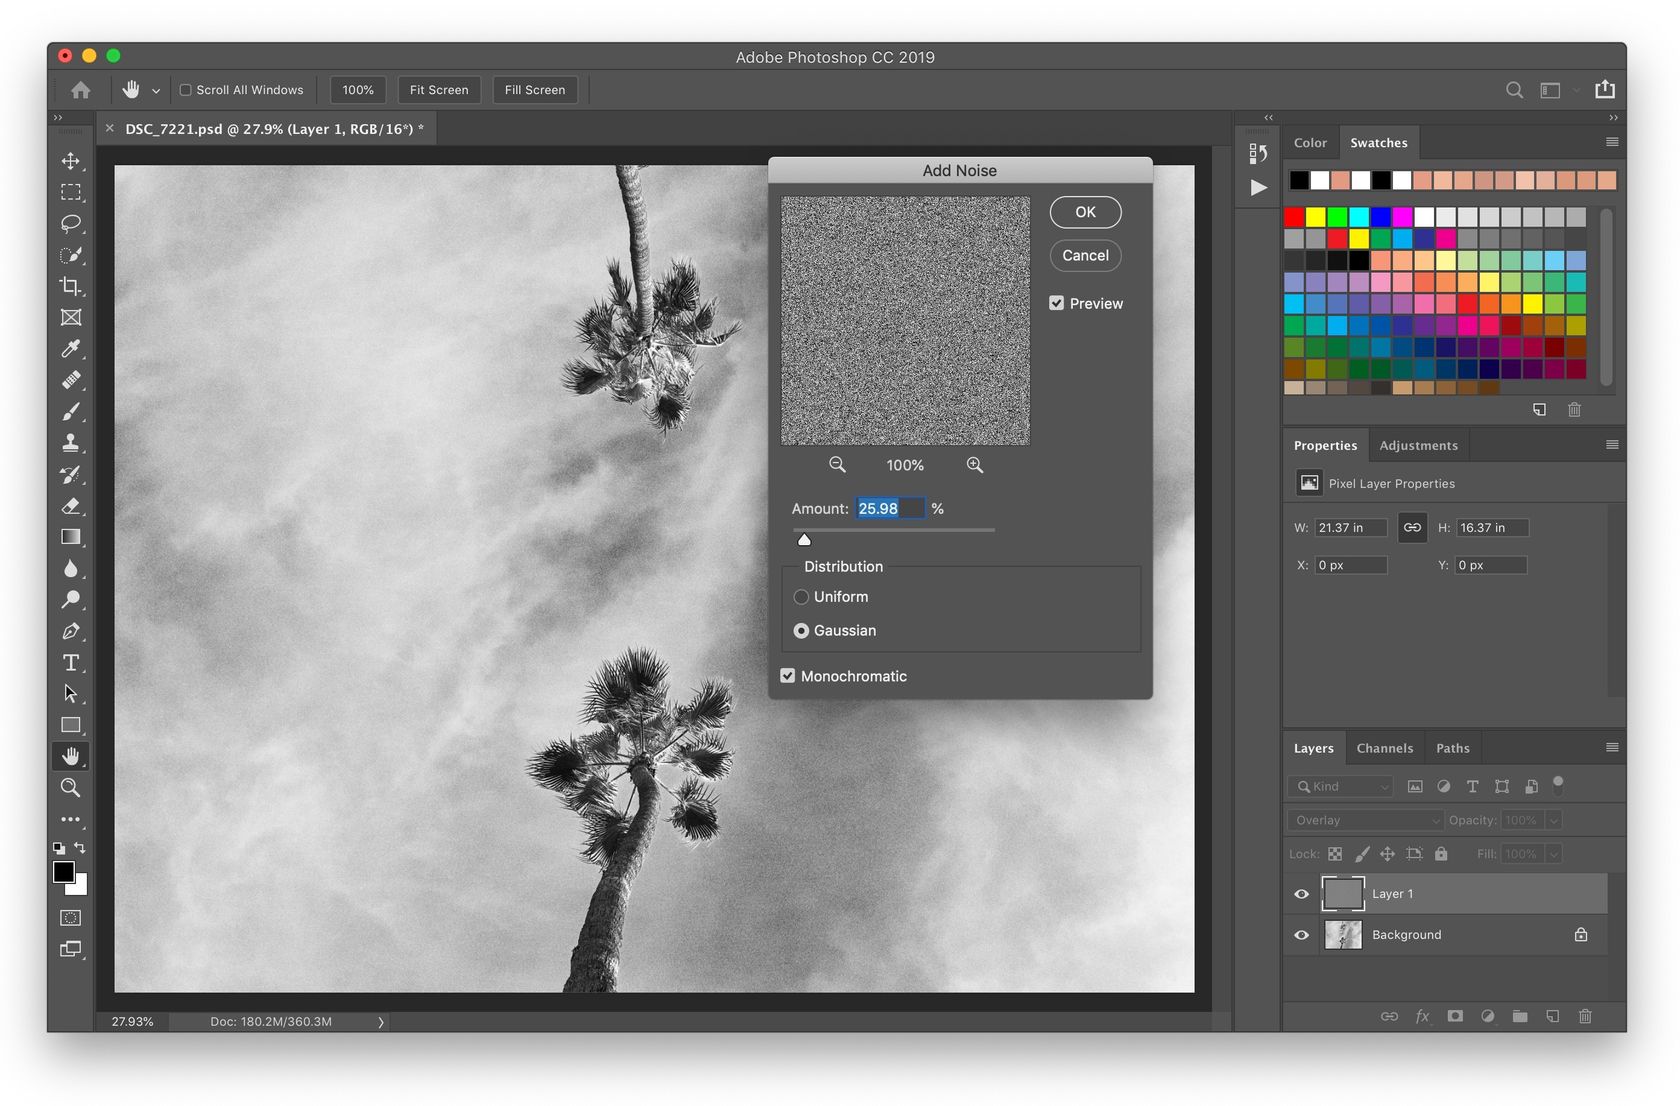
2- Adding Noise
Go to Filter > Noise > Add Noise, make sure the distribution is set to Gaussian and check the Monochromatic option. Monochromatic will ensure that the grain doesn’t have any color to it, and the Gaussian distribution will randomize the way the grain is laid out, instead of being in a predictable pattern.
Now just play around with the amount slider until you get something that looks good to your eyes.

And that’s all there is to it, simple enough! 👍
Extra Tip #1: Add Film Grain Last
Extra Tip: for best results, a little bit like with sharpening, add the grain as the last step in your retouching to your already resized images. Otherwise, the correct amount of grain won’t always look the greatest when you then reduce the size of the image by a lot after the fact.
Extra Tip #2: Smart Objects
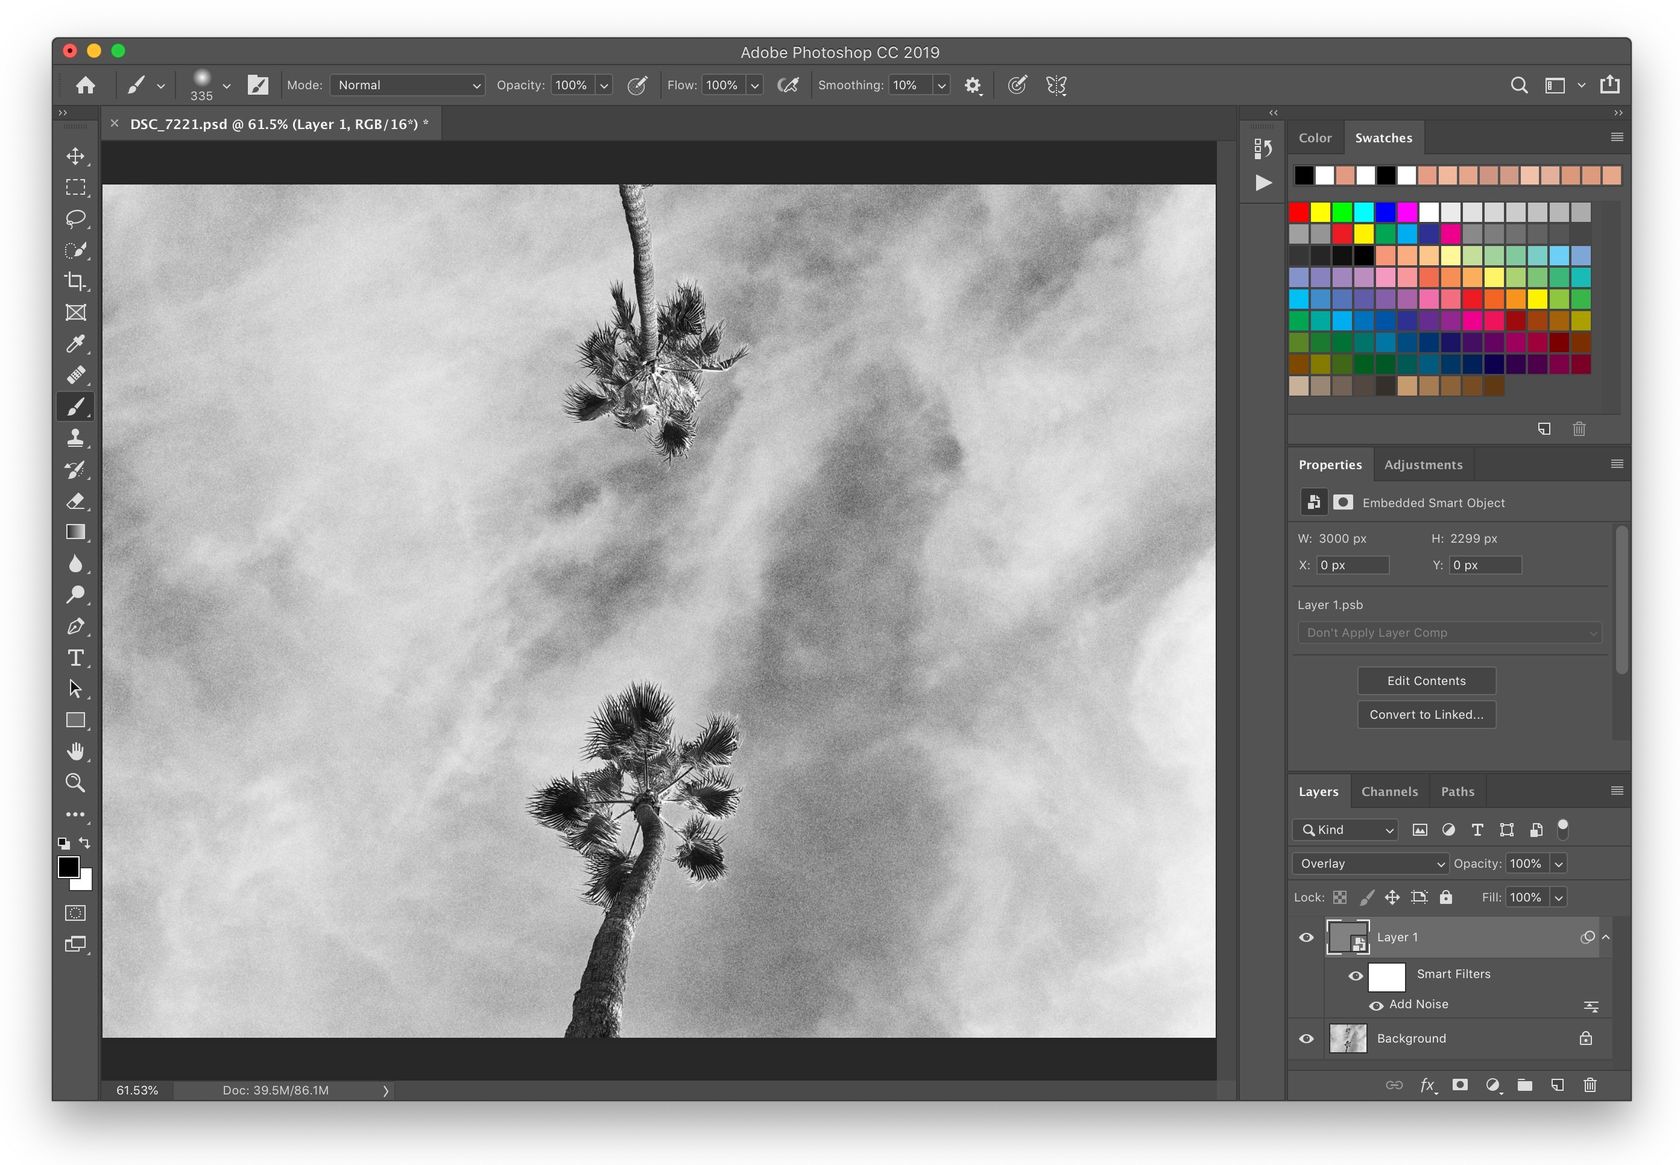
Transform the gray layer to a smart object before applying the noise and you’ll be able to change the amount after the fact instead of having to recreate the noise if you later decide you want to increate or decrease the amount.
To transform the layer to a smart object, just right-click on the layer and then select Convert to Smart Object.
Once you have a smart object layer that has some noise applied, you can double-click on the Add Noise part of the layer to access the Add Noise dialog and change the amount.

🌄 Image info:
- Camera: Nikon D800
- Focal length: 32mm
- Shutter speed: 1/60s
- Aperture: f/f/9
- ISO: 200