Creating HDR Images Using Lightroom Classic CC
HDR, short for High Dynamic Range is a photographing technique whereas multiple exposures of a same photographs are taken. This can allow for a final image that has more dynamic range, meaning more details in the shadows and in the highlights. This can allow for images with an amount of detail that wouldn't otherwise be possible with a single shot taken with cameras available today.
Most modern digital cameras offer a bracketing option where multiple shots can be taken in succession at various exposure settings. Or you can do it more manually and set the exposure values yourself. This is so that you end up with at least one underexposed shot, at least one correctly exposed one and at least one overexposed one. In this example, the HDR is created using 5 shots, with 2 underexposed, 2 overexposed and one in the middle.
These photos can then be processed through a software tool like Photoshop's HDR Pro or Lightroom to create a final HDR image. In this tutorial we'll make use of Lightroom Classic CC to accomplish this, and you'll see it's all pretty straightforward.
Before / After:
It’s very easy to do really. To get started, go ahead and import your exposure bracketed images, then select them, right click and choose Photo Merge > HDR.

This will bring up the HDR Merge dialog where you have a few basic options. You can keep the Auto Align active to ensure that the images are properly aligned if there was a smidge of movement between the shots. As for the Auto Settings option, you can leave it on and Lightroom takes a good first guess at the Develop settings, which you can always tweak afterwards anyway.
The deghost amount option can be useful if something appeared in some of your exposures, which would otherwise create what’s called a ghost in the processed image.

Now, once you hit Merge, a new RAW dng file will be created with a file name that ends with -HDR.dng. That’s your HDR image!

Don’t worry if things look a little bit flat at first. Just go into the Develop module for this newly created image, and adjust the settings as you would for any image that you edit in Lightroom. You’ll notice though that you’re able to tweaks your exposure, highlights, shadows, whites and blacks to a much greater extend than you normally could with a regular image. You can really push the settings and bring out the details.
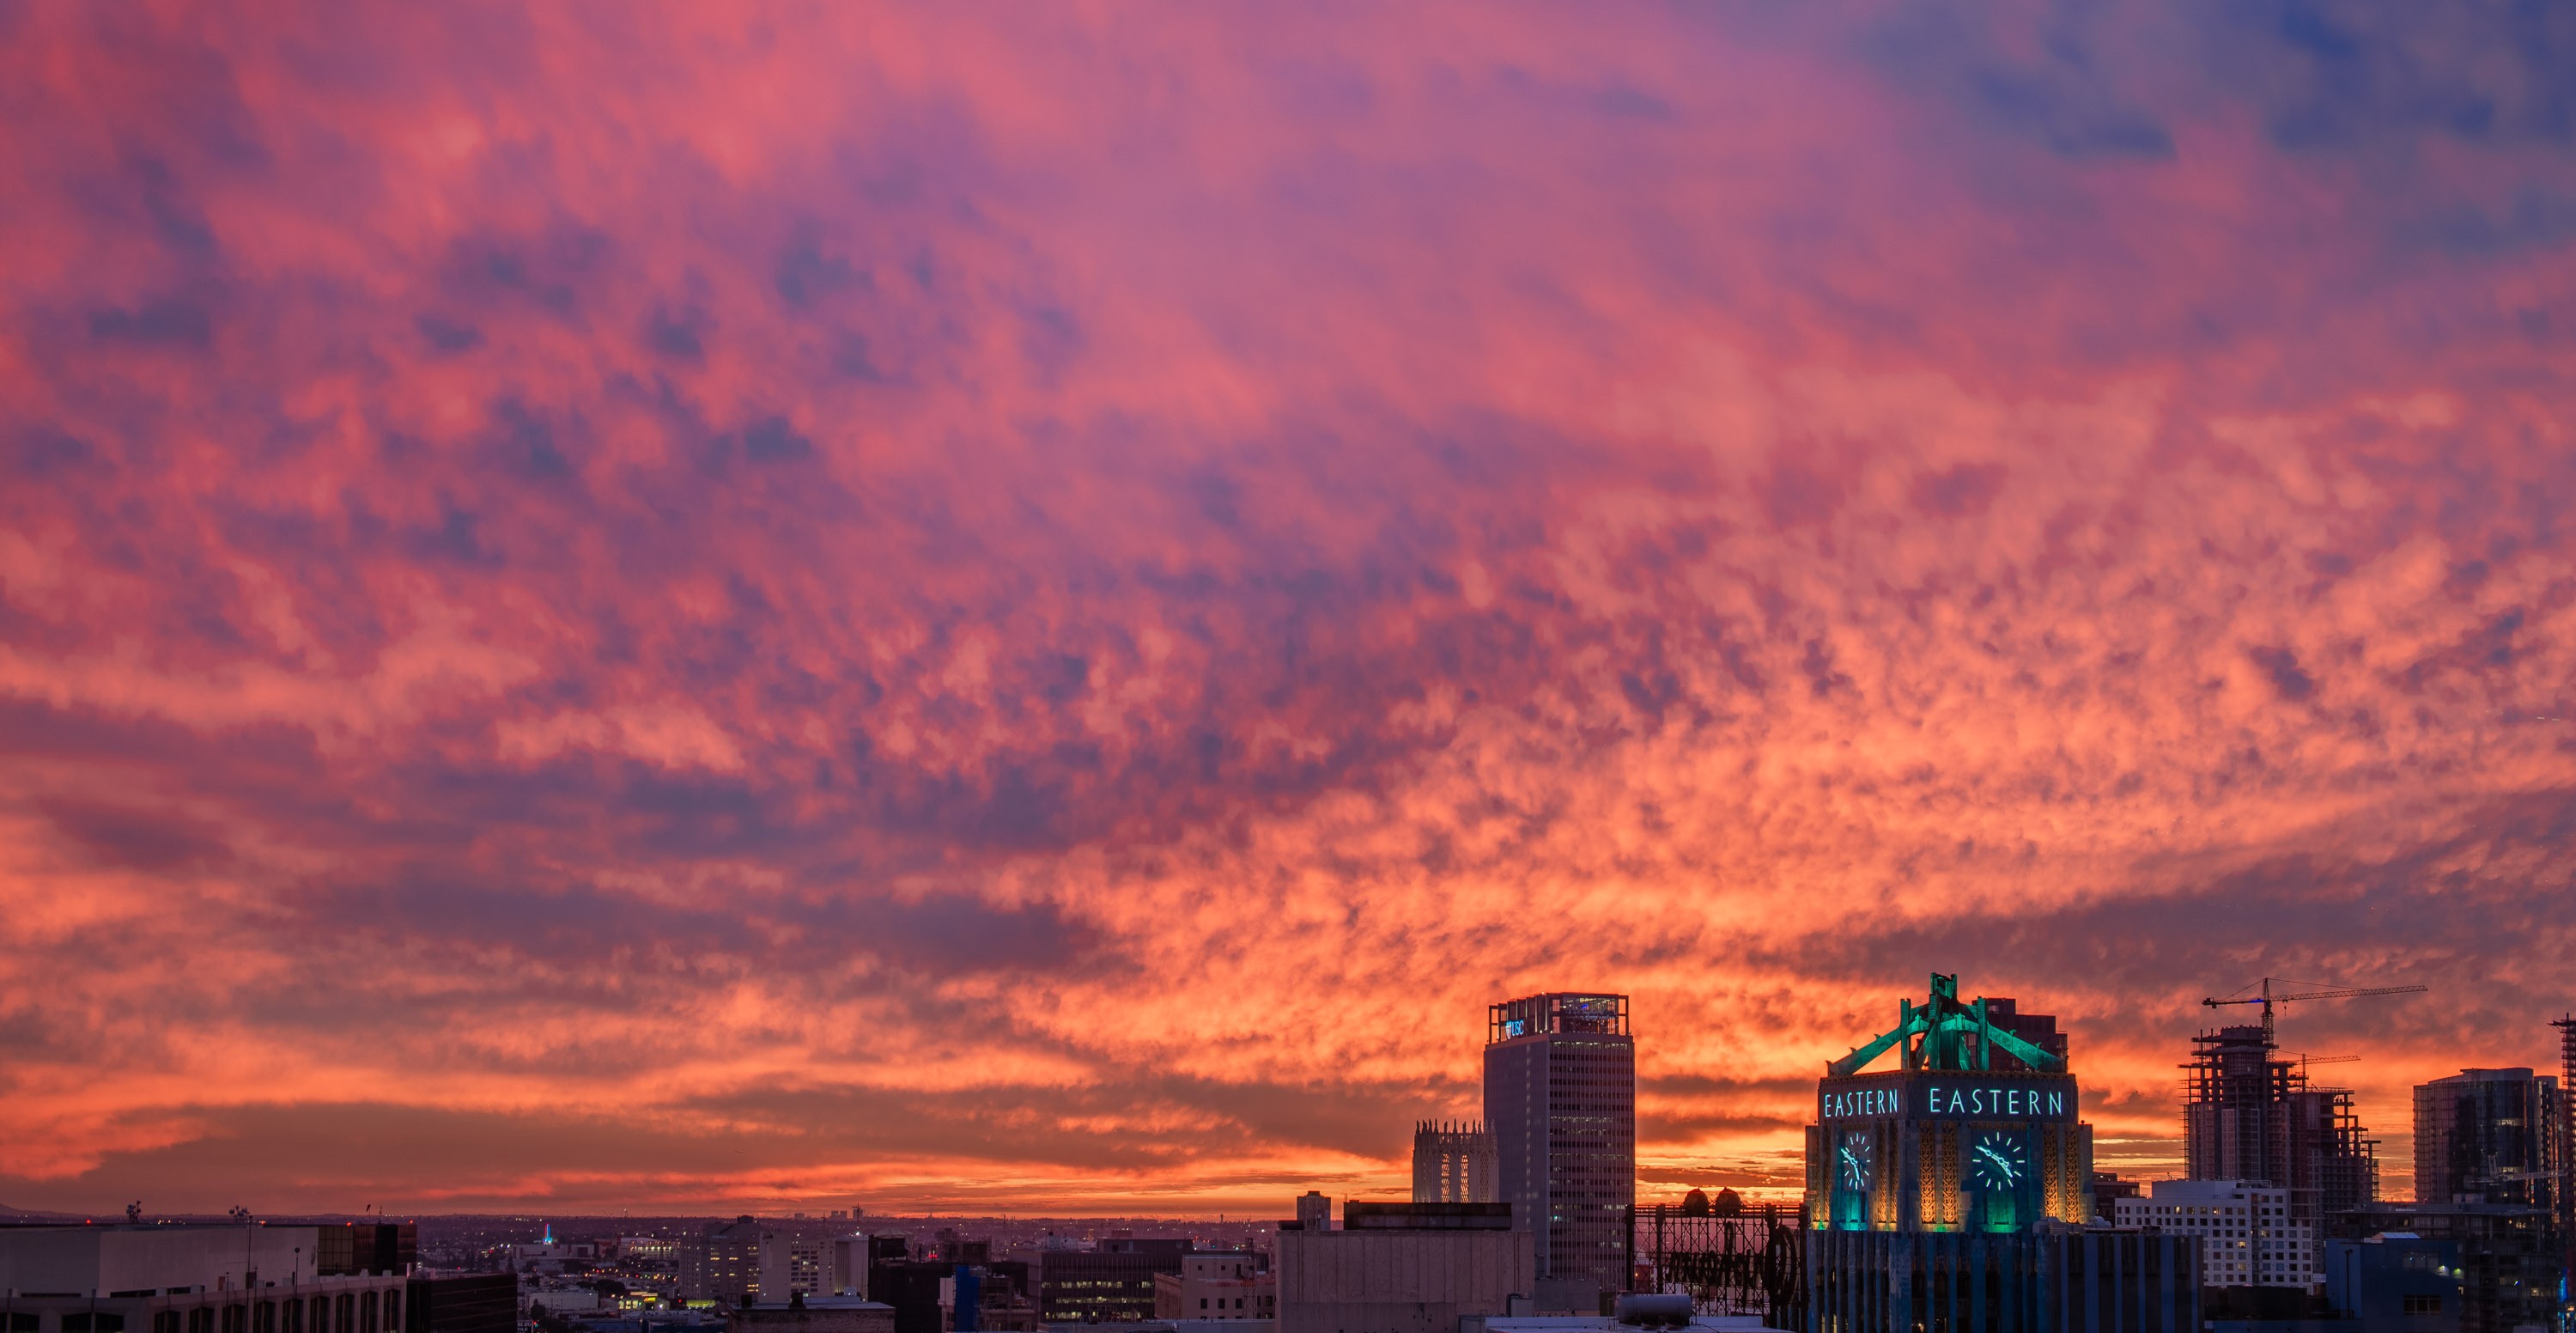
Here, for example, I pushed up my shadows and blacks, and pushed down my highlights and shadows. With the amount of data available in the HDR image, I could have instead also pushed up my whites and highlights, but here I decided that I preferred the darker/contrasty sky.
I also added some clarity and vibrance. I also played around with the hue and saturation of some of the colors like the blues, oranges and yellows, to really bring the image together.

That’s unrelated to the HDR part, but to finish up the image I set the Upright setting from the Transform panel to Auto to straighten up the buildings and then cropped out what was eaten out by the Upright setting. Oh, and I also spot removed the plane that was in the sky.
Wrapping Up
🌆 And there you have it! An easy way to turn your exposure bracketed photographs into beautiful final images. Stay tuned for future posts where I’ll cover HDR photography more in-depth with tips & tricks at shooting time.
🌄 Image info:
- Camera: Nikon D800
- Focal length: 34mm
- Shutter speed: 1/5s
- Aperture: f/8
- ISO: 100