How to Create a Bleach Bypass Effect in Adobe Photoshop
Bleach bypass is a creative effect that comes from the time of film where the bleach step was omitted. This effectively creates a final image that has a very distinct desaturated and high contrast look.
It's easy to recreate such effect in Photoshop, and there are many ways to do so. In this quick tutorial, we'll make use of 3 adjustment layers to achieve the effect: Hue/Saturation, Brightness/Contrast and Color Lookup
Before / After:
1- Reducing Saturation
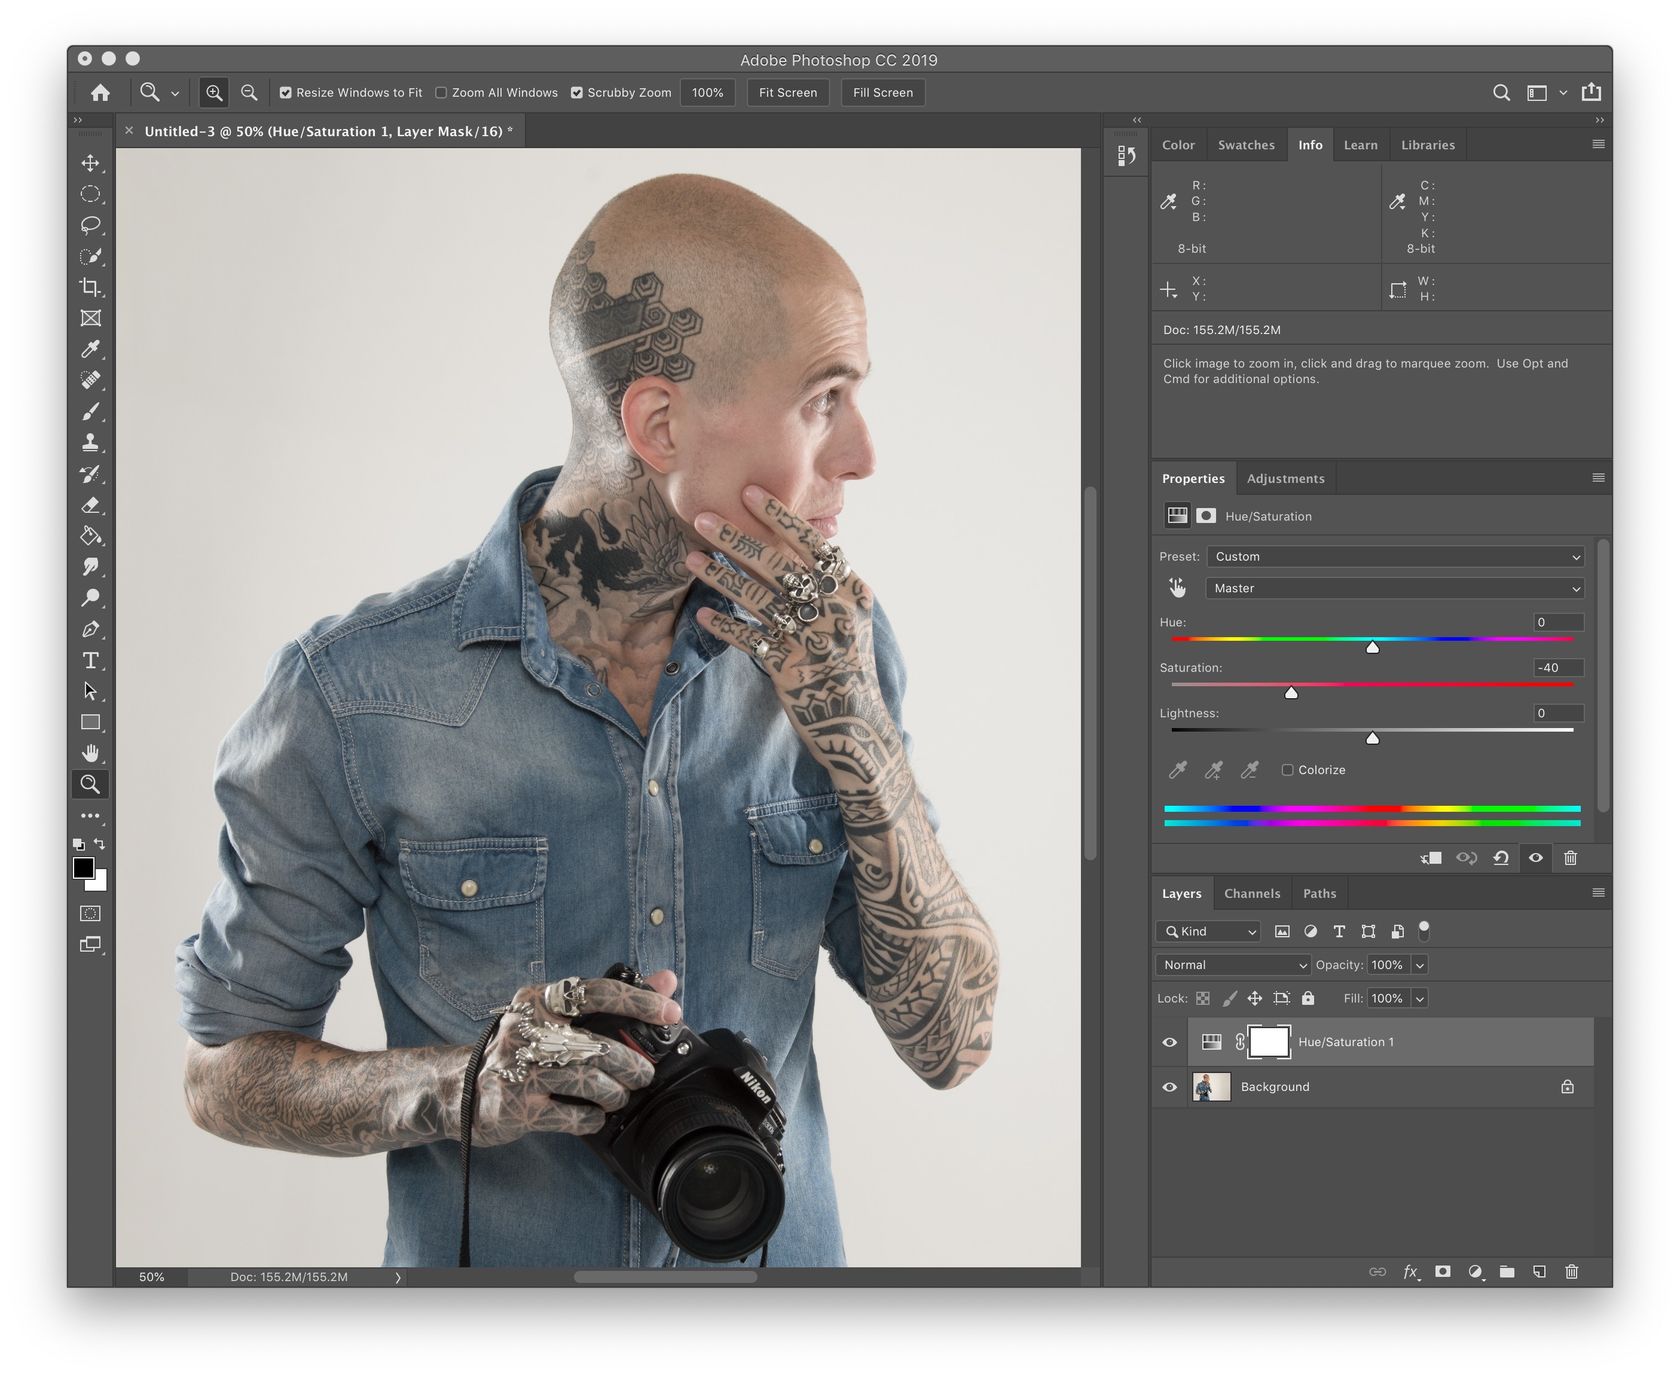
Since the bleach bypass effect is all about a desaturated look, it makes sense that reducing the image’s saturation would be part of it.
Go ahead and add a Hue/Saturation adjustment layer. In this case, I’ve reduced the saturation to -40, but you’ll want to adjust so that it looks good for your particular image.
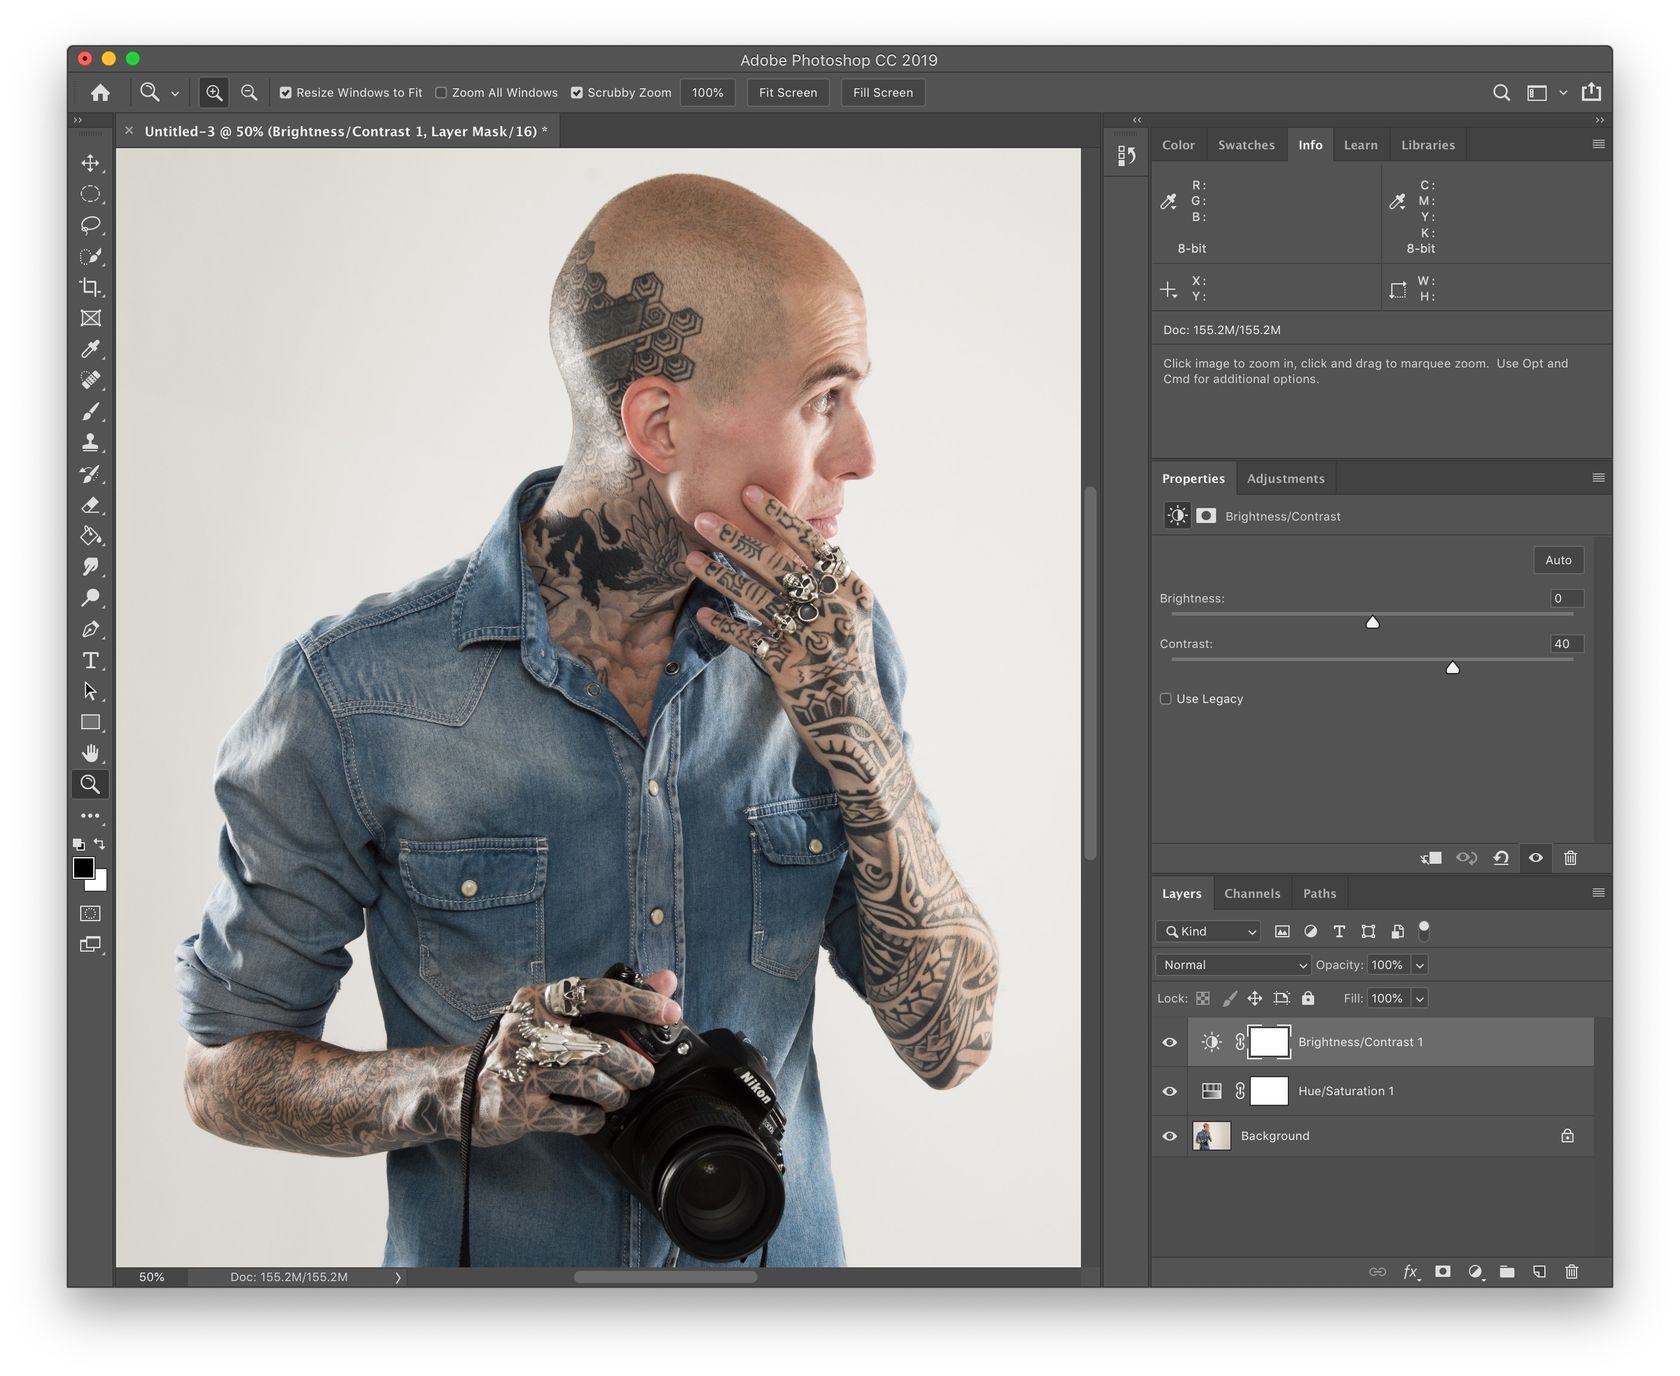
2- Increasing Contrast
Now, for the high contrast part, simply add a Brightness/Contrast adjustment layer. I increased the contrast to a value of 40, but again that’ll vary depending on how contrasty you want the image to be.
3- Bleach Bypass Effect
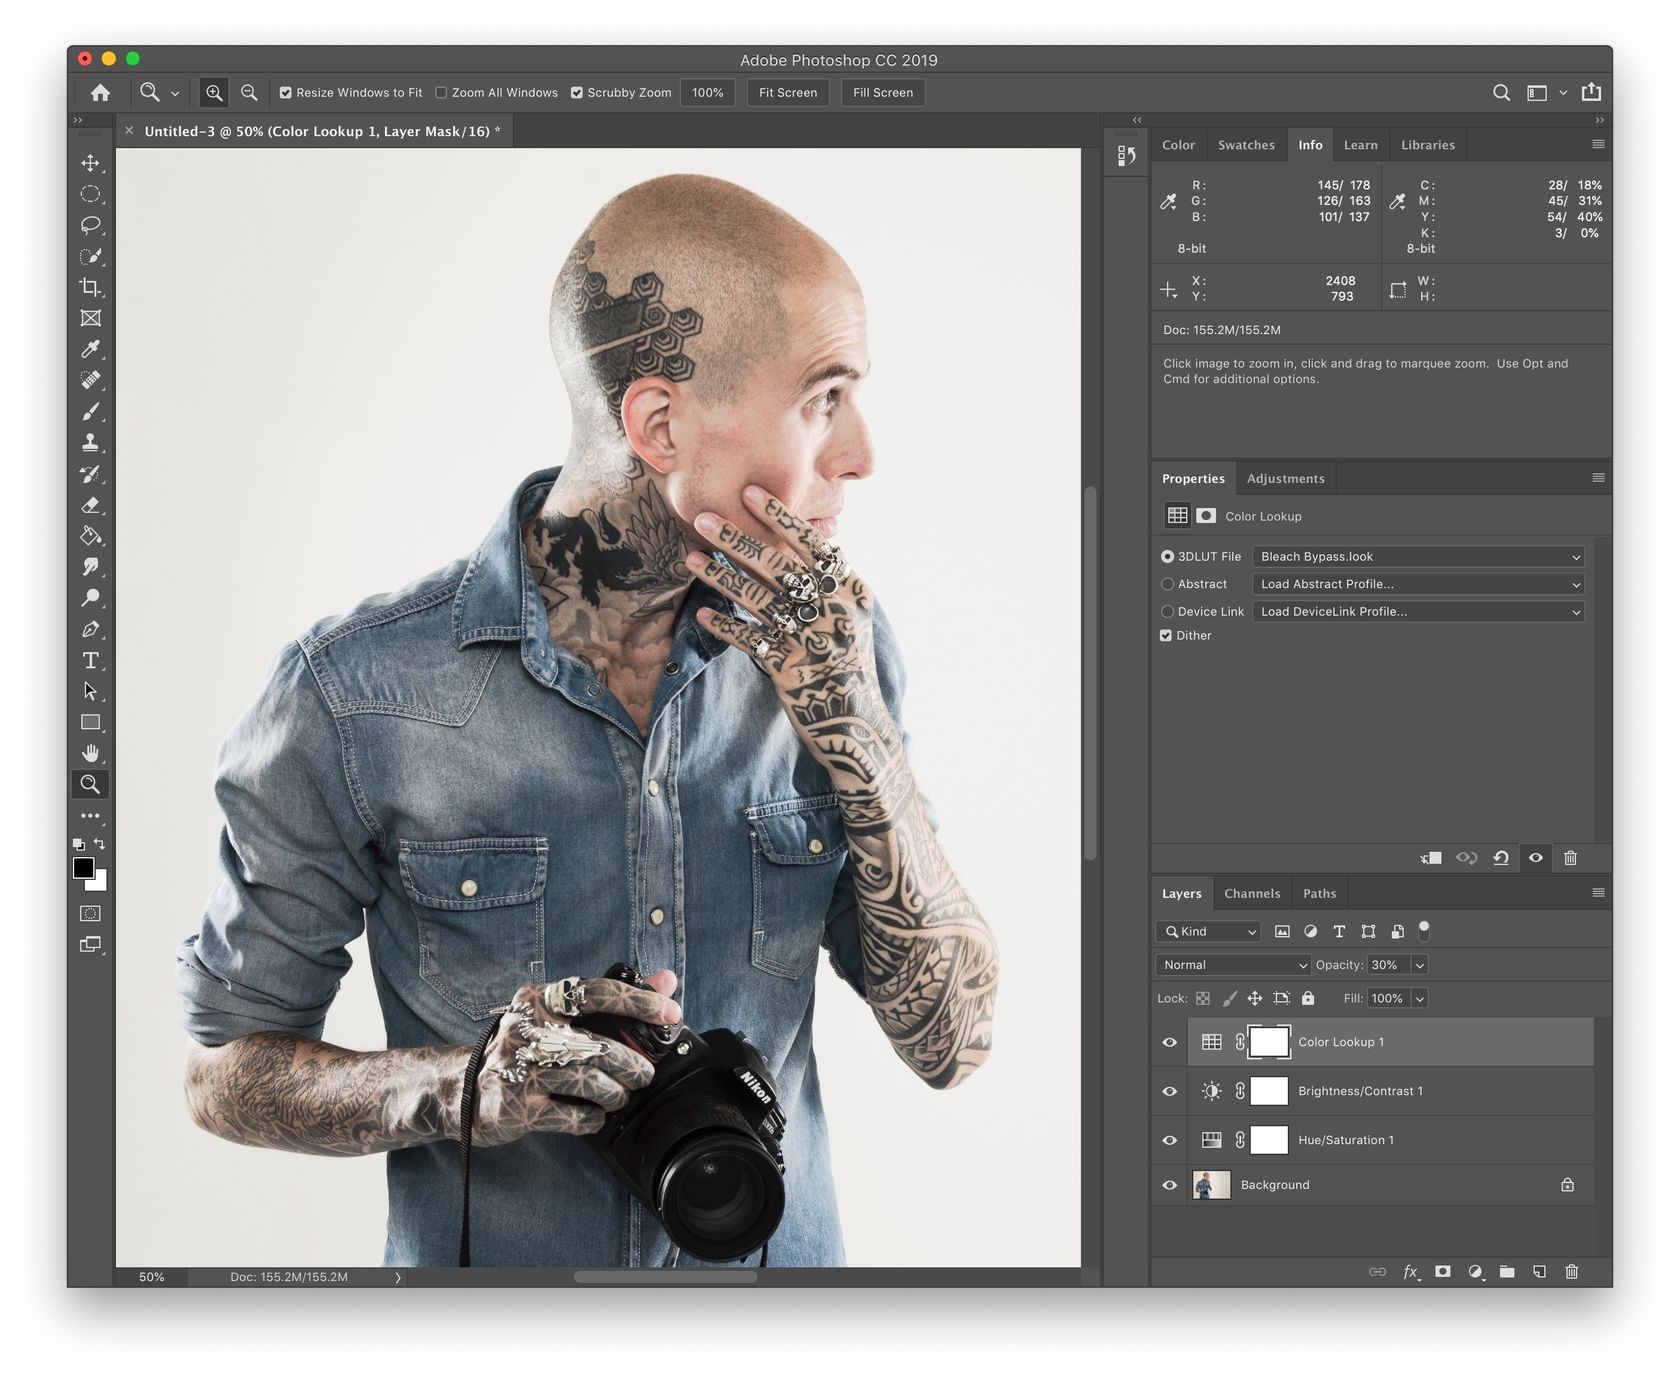
🍒 Now for the final piece of this effect, we’ll add a Color Lookup adjustment layer and choose Bleach Bypass.look under 3DLUT File. Color Lookup uses color mapping profiles for instructions on how to map colors in the images to other colors. By default Photoshop comes with a bunch of such profiles to create different film effects, and Bleach Bypass happens to be one such default profiles.
With the particular image in our example, the full effect is too strong and overblown, so I’ve reduced the opacity to 30%. Adding this effect will increase the strength of the highlights in a bleach bypass/high contrast fashion.
Alternate Method
I mentioned that there’s often more than one way to accomplish an effect with Photoshop. If the end result of the above technique doesn’t look like you’d like, you can try this alternative method to create a bleach bypass effect:
- Create a hue/saturation adjustment layer and bring the saturation all the way to 0. Now change the blend mode of that layer to Color.
- Duplicate the background layer and place it on top of the hue/saturation adjustment. Change the blend mode of that copy to Softlight.
- Now you can group both the saturation adjustment layer and the background copy and you can tweak the opacity of the group a little bit if the default effect is too strong.
There are many more ways to do this, but it all comes down to desaturating the image, increasing the highlights, and increasing the contrast/details.
🌄 Image info:
- Camera: Nikon D800
- Focal length: 40mm
- Shutter speed: 1/60s
- Aperture: f/9
- ISO: 400


