What is Exposure Compensation?
Your camera has a light meter inside of it. If your shooting in manual mode you’ll use the reading on that light meter to set the exposure triangle values. And if you’re shooting in program mode, aperture priority or shutter priority, your camera will make use of the meter reading to decide on the aperture, shutter speed and ISO to get proper exposure.
But what if, in spite of your best efforts with setting the proper metering mode for the scene you’re shooting, your camera’s light meter is still not arriving at a result that makes your photos exposed how you’d like? It’s not so bad if you’re shooting in manual mode because you can consciously set your exposure to be over or under what the meter is reading. But if you’re shooting in any of the semi-automatic modes, your photos will be over or under-exposed. Enter exposure compensation:
- Exposure compensation is a setting in your camera that allows you to tell the camera to tweak the exposure by a specified amount of stops.
- Most cameras will allow you to dial-in exposure compensation up to 3 stops over or under and by increments of 1/3 stops. For example, you could set exposure compensation to +0.6 to have the camera expose at 0.6 stop over what its meter reads.
- Some cameras are known to slightly over or under-expose consistently, in which case you could just set and forget your exposure compensation to make up for that.
I use exposure compensation all the time. For example, when I’m outside and shooting and the light condition changes consistently, I like to shoot in aperture priority. I set my desired aperture, the camera decides what the shutter speed and ISO should be. Now all I have to do is concentrate on the shot and composition, and the only setting I need to tweak from time to time is the exposure compensation if I notice that some shots are being over or under-exposed.
How to Set Exposure Compensation?
Here’s how to set exposure compensation for your camera:
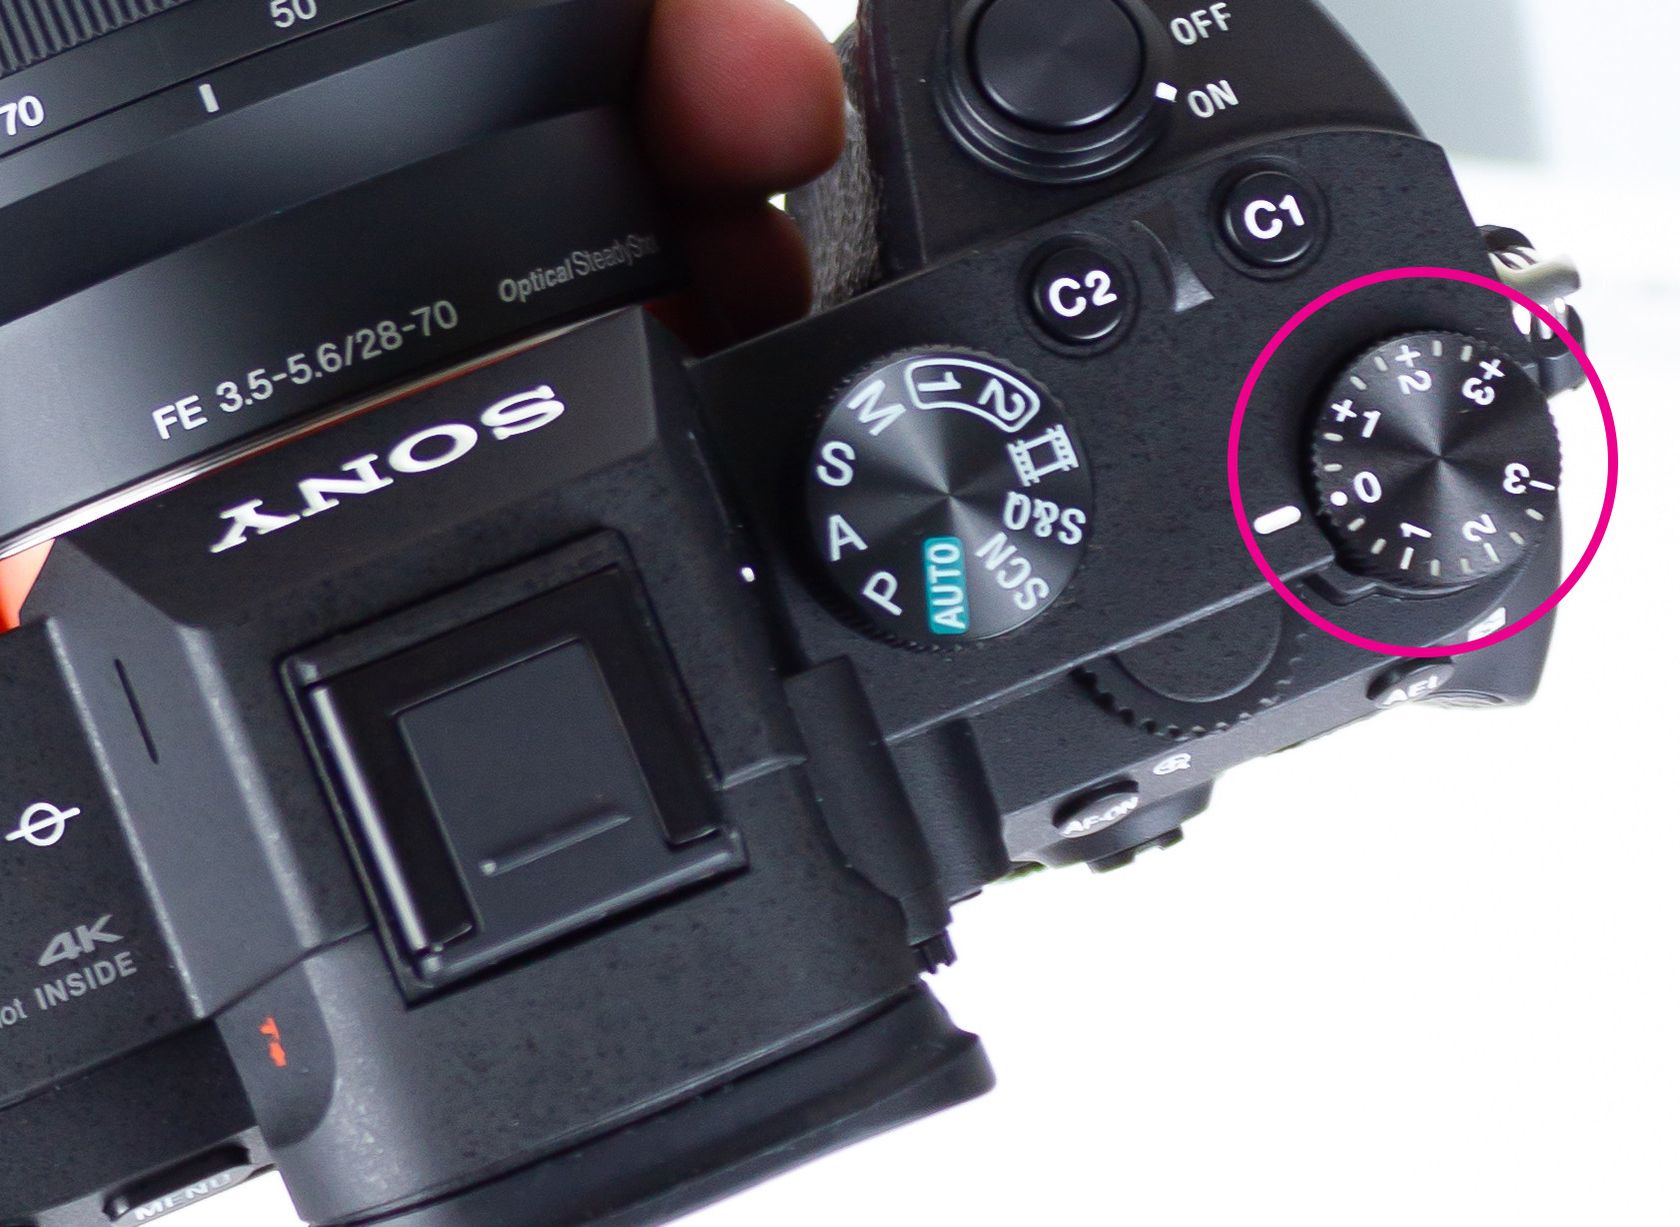
Sony Cameras
Sony cameras have a dedicated dial just for exposure compensation, which is really nice if you ask me! Just turn the dial to set a positive or negative exposure compensation:

Nikon Cameras
Nikon cameras have a button that looks like the cover of this post (with the +/-). Just hold that button while scrolling the main dial to set the exposure compensation:

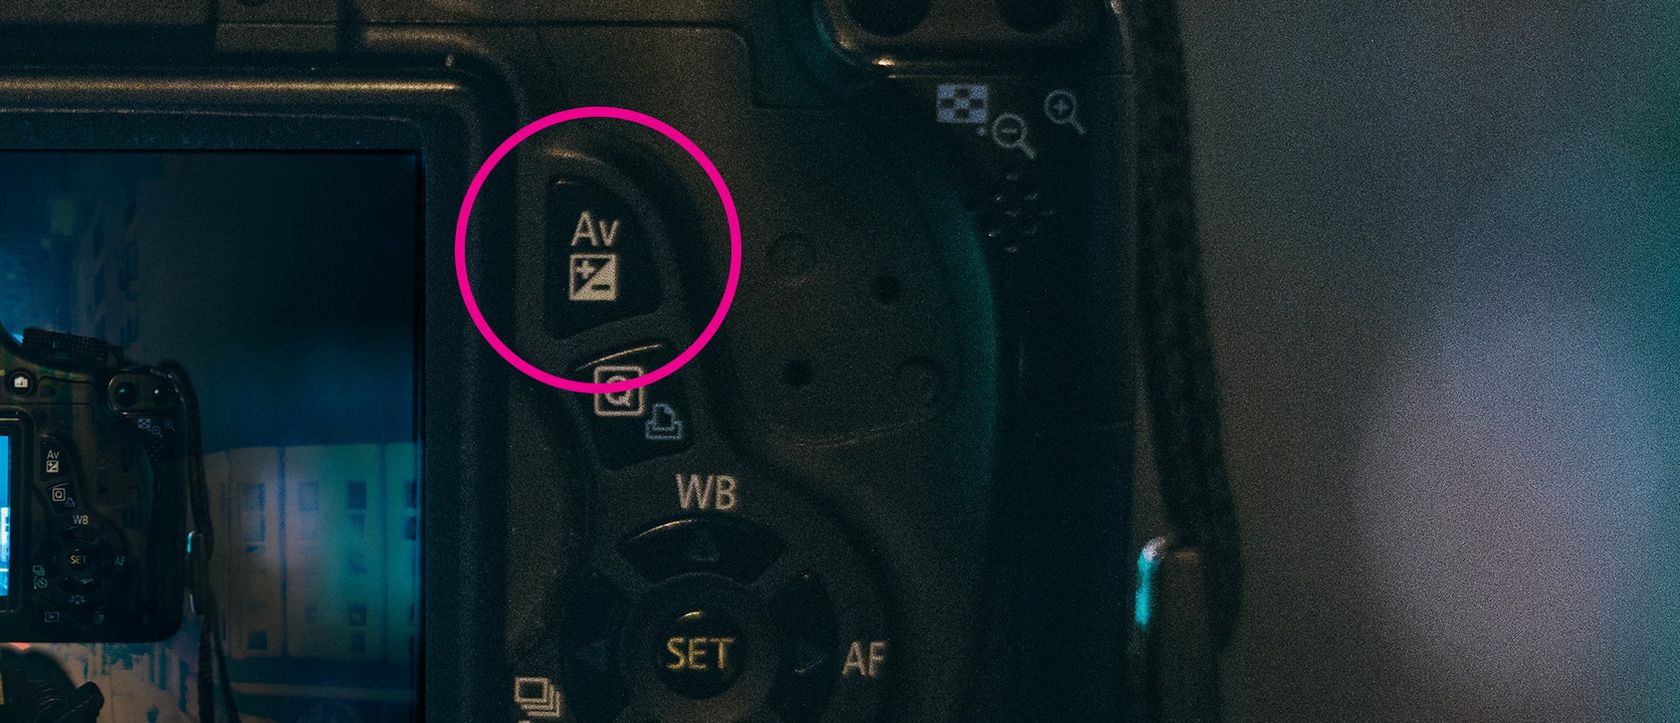
Canon Cameras
Just as with Nikon cameras, hold down the exposure compensation button and then dial-in your desired exposure compensation setting using the main dial. You’ll see the exposure compensation setting change on your camera’s monitor.

What About Flash Exposure Compensation?
Now that you understand what exposure compensation is, you might be wondering what flash exposure compensation is. Simple, if you’re shooting with your flashes in TTL (through the lens), the camera once again makes the decision for you to try and properly expose the scene by deciding on the flash power. And once again if your camera gets it wrong and tells the flash to use a power setting that’s too high or too low, you can use flash exposure compensation to make up for that.
Don’t Forget to Reset Exposure Compensation!
I common mistake is to forget to reset the exposure compensation setting when you’re done shooting. Then the next time you shoot you’ll be wondering why everything is over or under-exposed. Try to remember to always reset the exposure compensation to 0 when you’re done shooting!