TIFF vs PSD, Which File Format to Use for Photography?
Not sure in what file format to save your Photoshop photo edits? The short answer is: use the TIFF file format to save all your edits. Keep on reading if you want to know why.
There are basically 3 choices available to save layered files in Photoshop: PSD, PSB and TIFF. All 3 will work just fine in most cases, and you’re probably most used to using PSD files.
It’s slightly better to use TIFF files however. It offers everything that the PSD file format offers and will save your layers just as a PSD file would. Here are 3 main reasons why the TIFF file format is better:
- Metadata updates can be faster with the TIFF format.
- It’s the industry standard. That means that other graphic softwares will usually be able to read images in the TIFF file format just fine, while that’s not always the case for PSD files. You can also usually send TIFF files directly to printers to have your photographs printed. Your operating system should also be better at previewing TIFF file in your file explorer.
- TIFF file can be larger than 2Gb, while with PSD files you’d have to start saving as a PSB (Photoshop Big) when the file gets larger than 2GB.
2Gb Files, Who Cares?
You might be thinking, well there’s just no chance that my files will ever be larger than 2Gb. Well actually, with today’s cameras you’d be surprised! With my 36.3 megapixel Nikon D800 for example, my edits very often end up being over that 2Gb mark, especially with the sharpening and skin detail work that I add. And the D800 is not exactly a new camera either, so newer cameras will increasingly create larger and larger files.
Settings to Use for TIFF
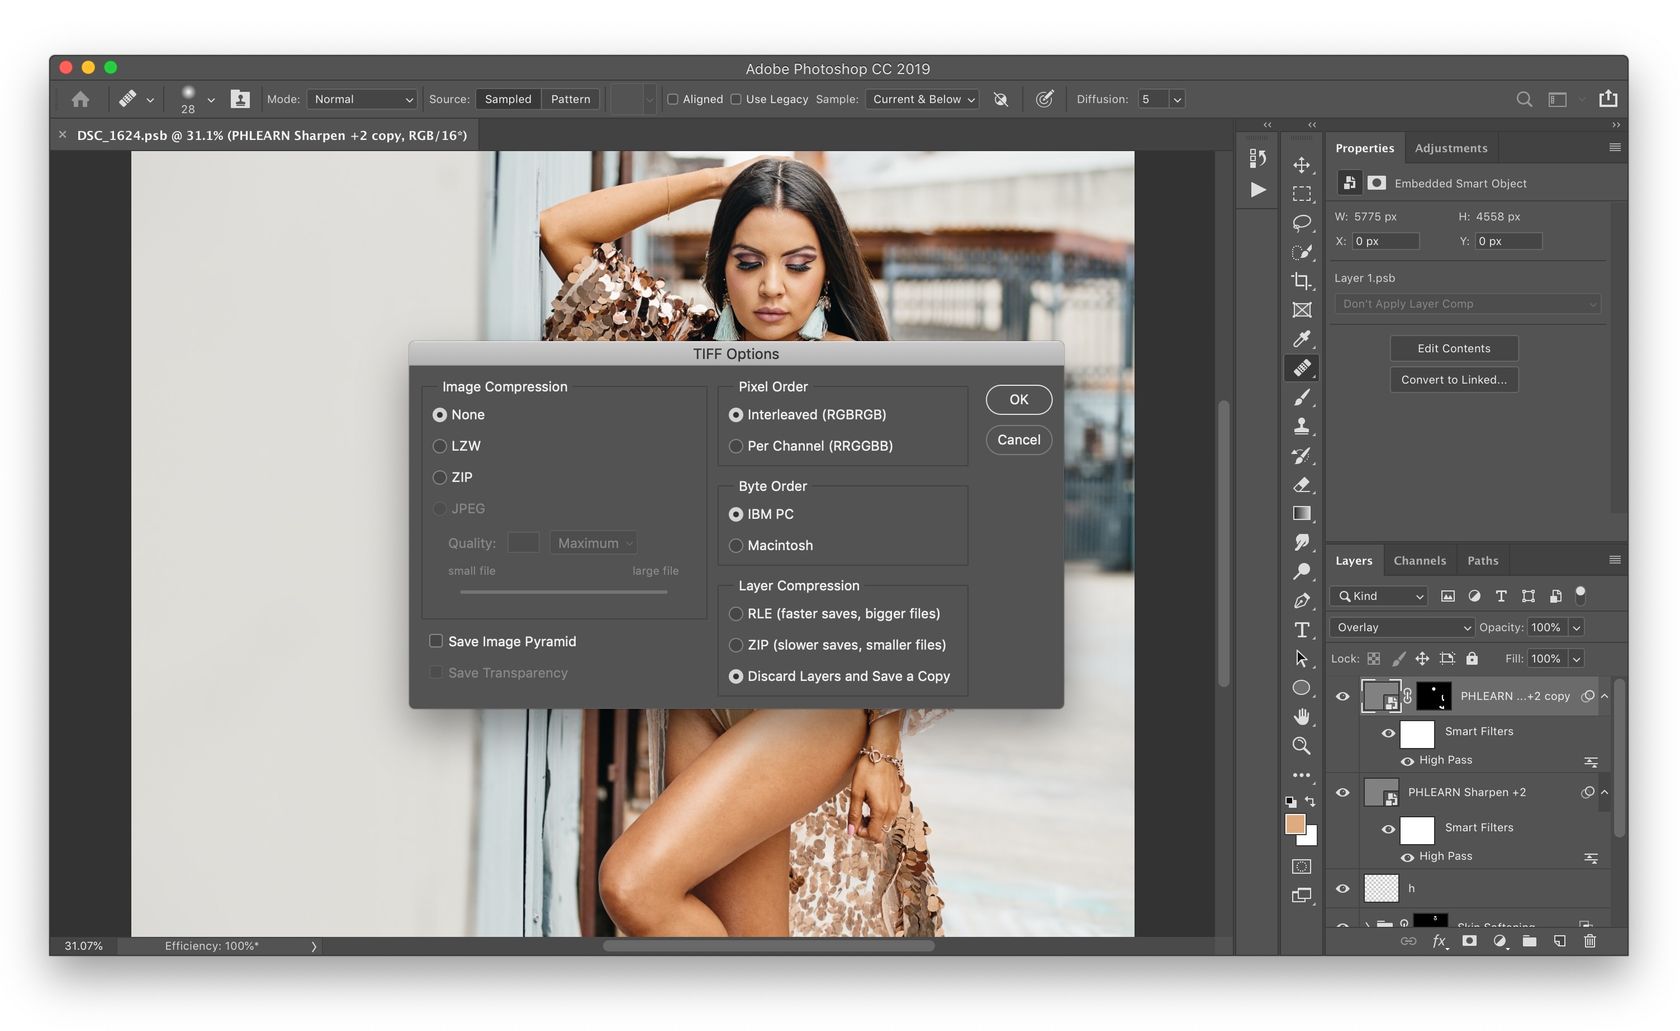
Maybe you’ve been shying away from saving as TIFF because when you do so you’re presented with a dialog window with a bunch of options that sound like gibberish.
Actually it’s easier than you might think. Just keep the default options:

That is:
- Image Compression: None
- Pixel Order: Interleaved
- Byte Order: IBM PC
- Layer Compression: RLE
And there’s actually a little trick to save space on your computer or when sending files to a printer or a client. In those cases you can select Discard Layers and Save a Copy:

This will save a duplicate flattened TIFF file without any layer information, but you’ll still preserve the full image quality, as opposed to JPEGs files, which lose quality. If you’re confident that an edit is final and that you won’t have to ever go back in the layers to modify an edit, you can save your files as such flattened TIFF and that’ll save a ton of space on your drive. If, like me, you’d rather keep your layered files just in case, you can still use these flattened TIFF to send to printers or clients.
Using TIFF Instead of PSD from Lightroom
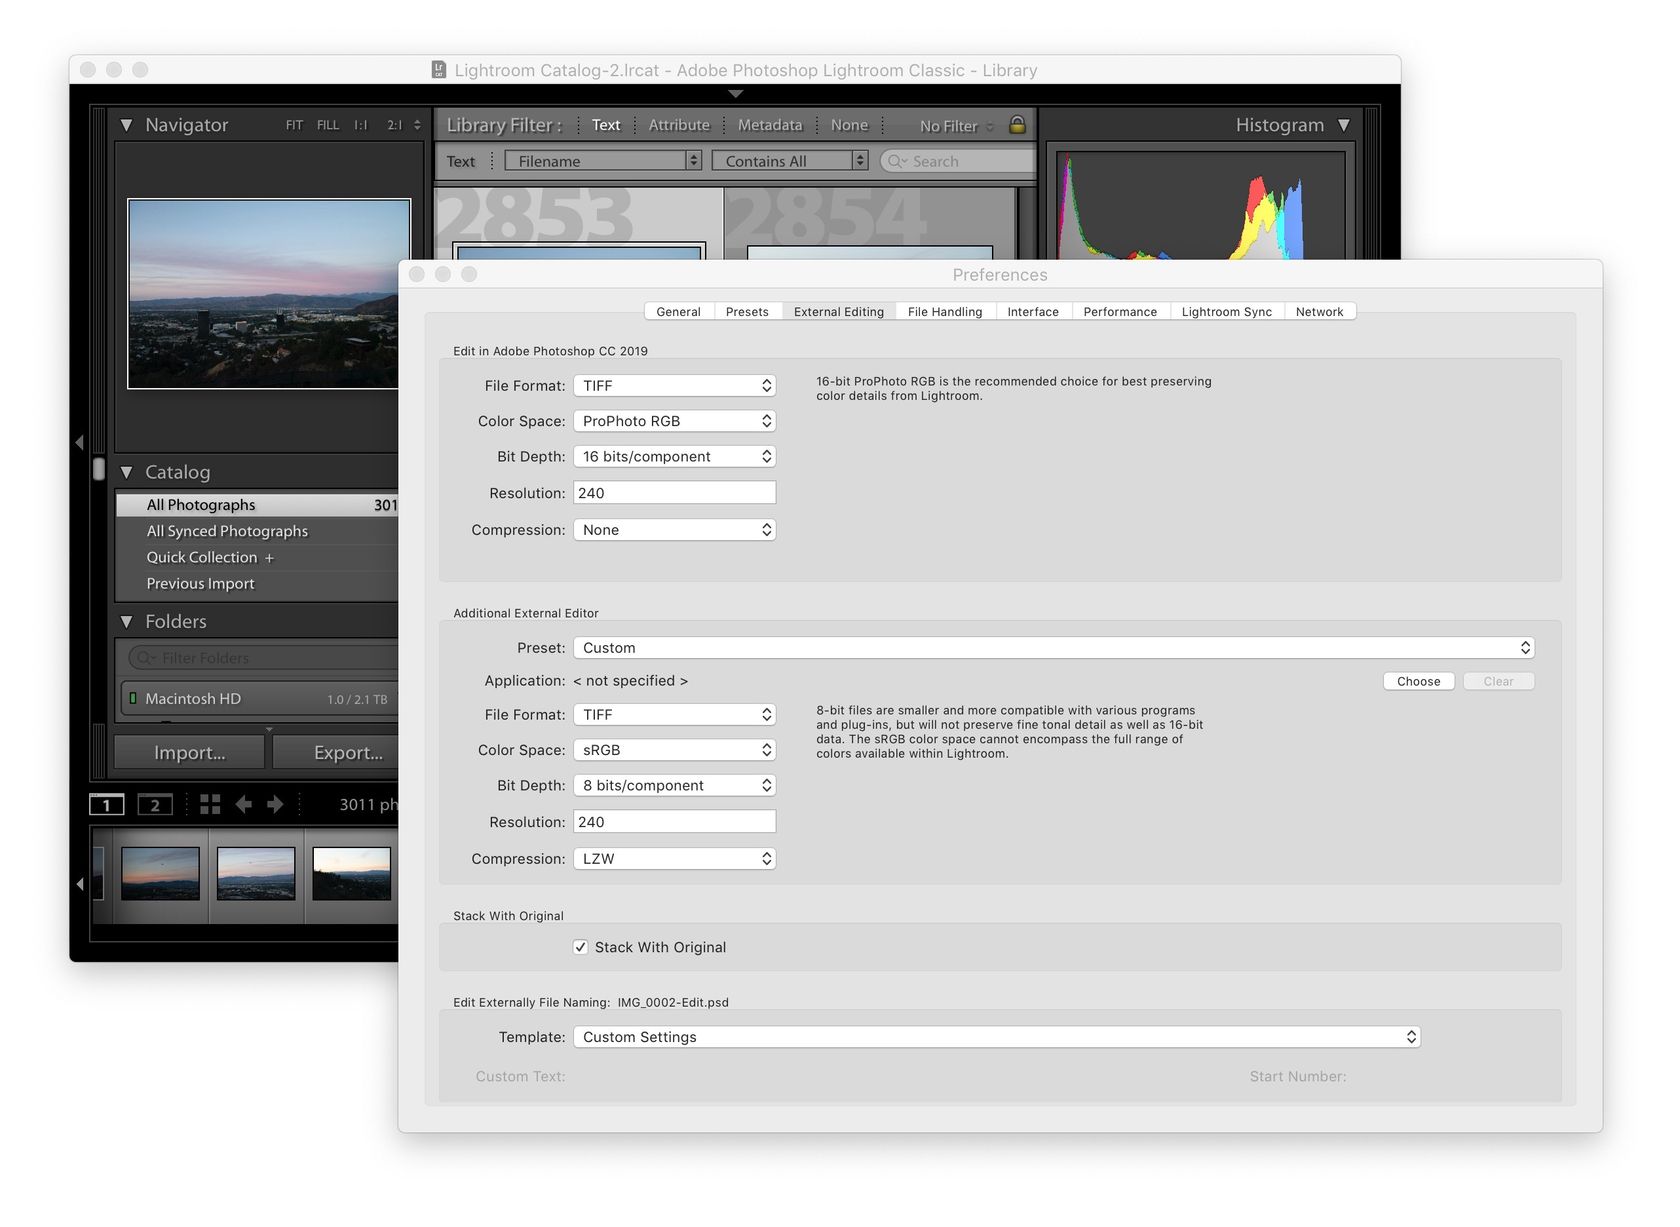
Convinced and want to change your workflow from PSD files over to TIFF files and not sure how to do that from Lightroom?
Just head over to your Lightroom preferences, then go to the External Editing tab. Now under the 1st section (Edit in Photoshop CC…), select TIFF as the file format:
