How to Create a Black & White Image in Adobe Photoshop Using a Channel Mixer
The two primary ways to convert an image to black and white in Photoshop are the Black & White adjustment layer or the Channel Mixer adjustment layer. Both are great because they offer a lot of flexibility and control. For example, with both adjustment layers the underlining lightness for different colors can be tweaked, which can help create some creative effects/contrast in your final black and white images.
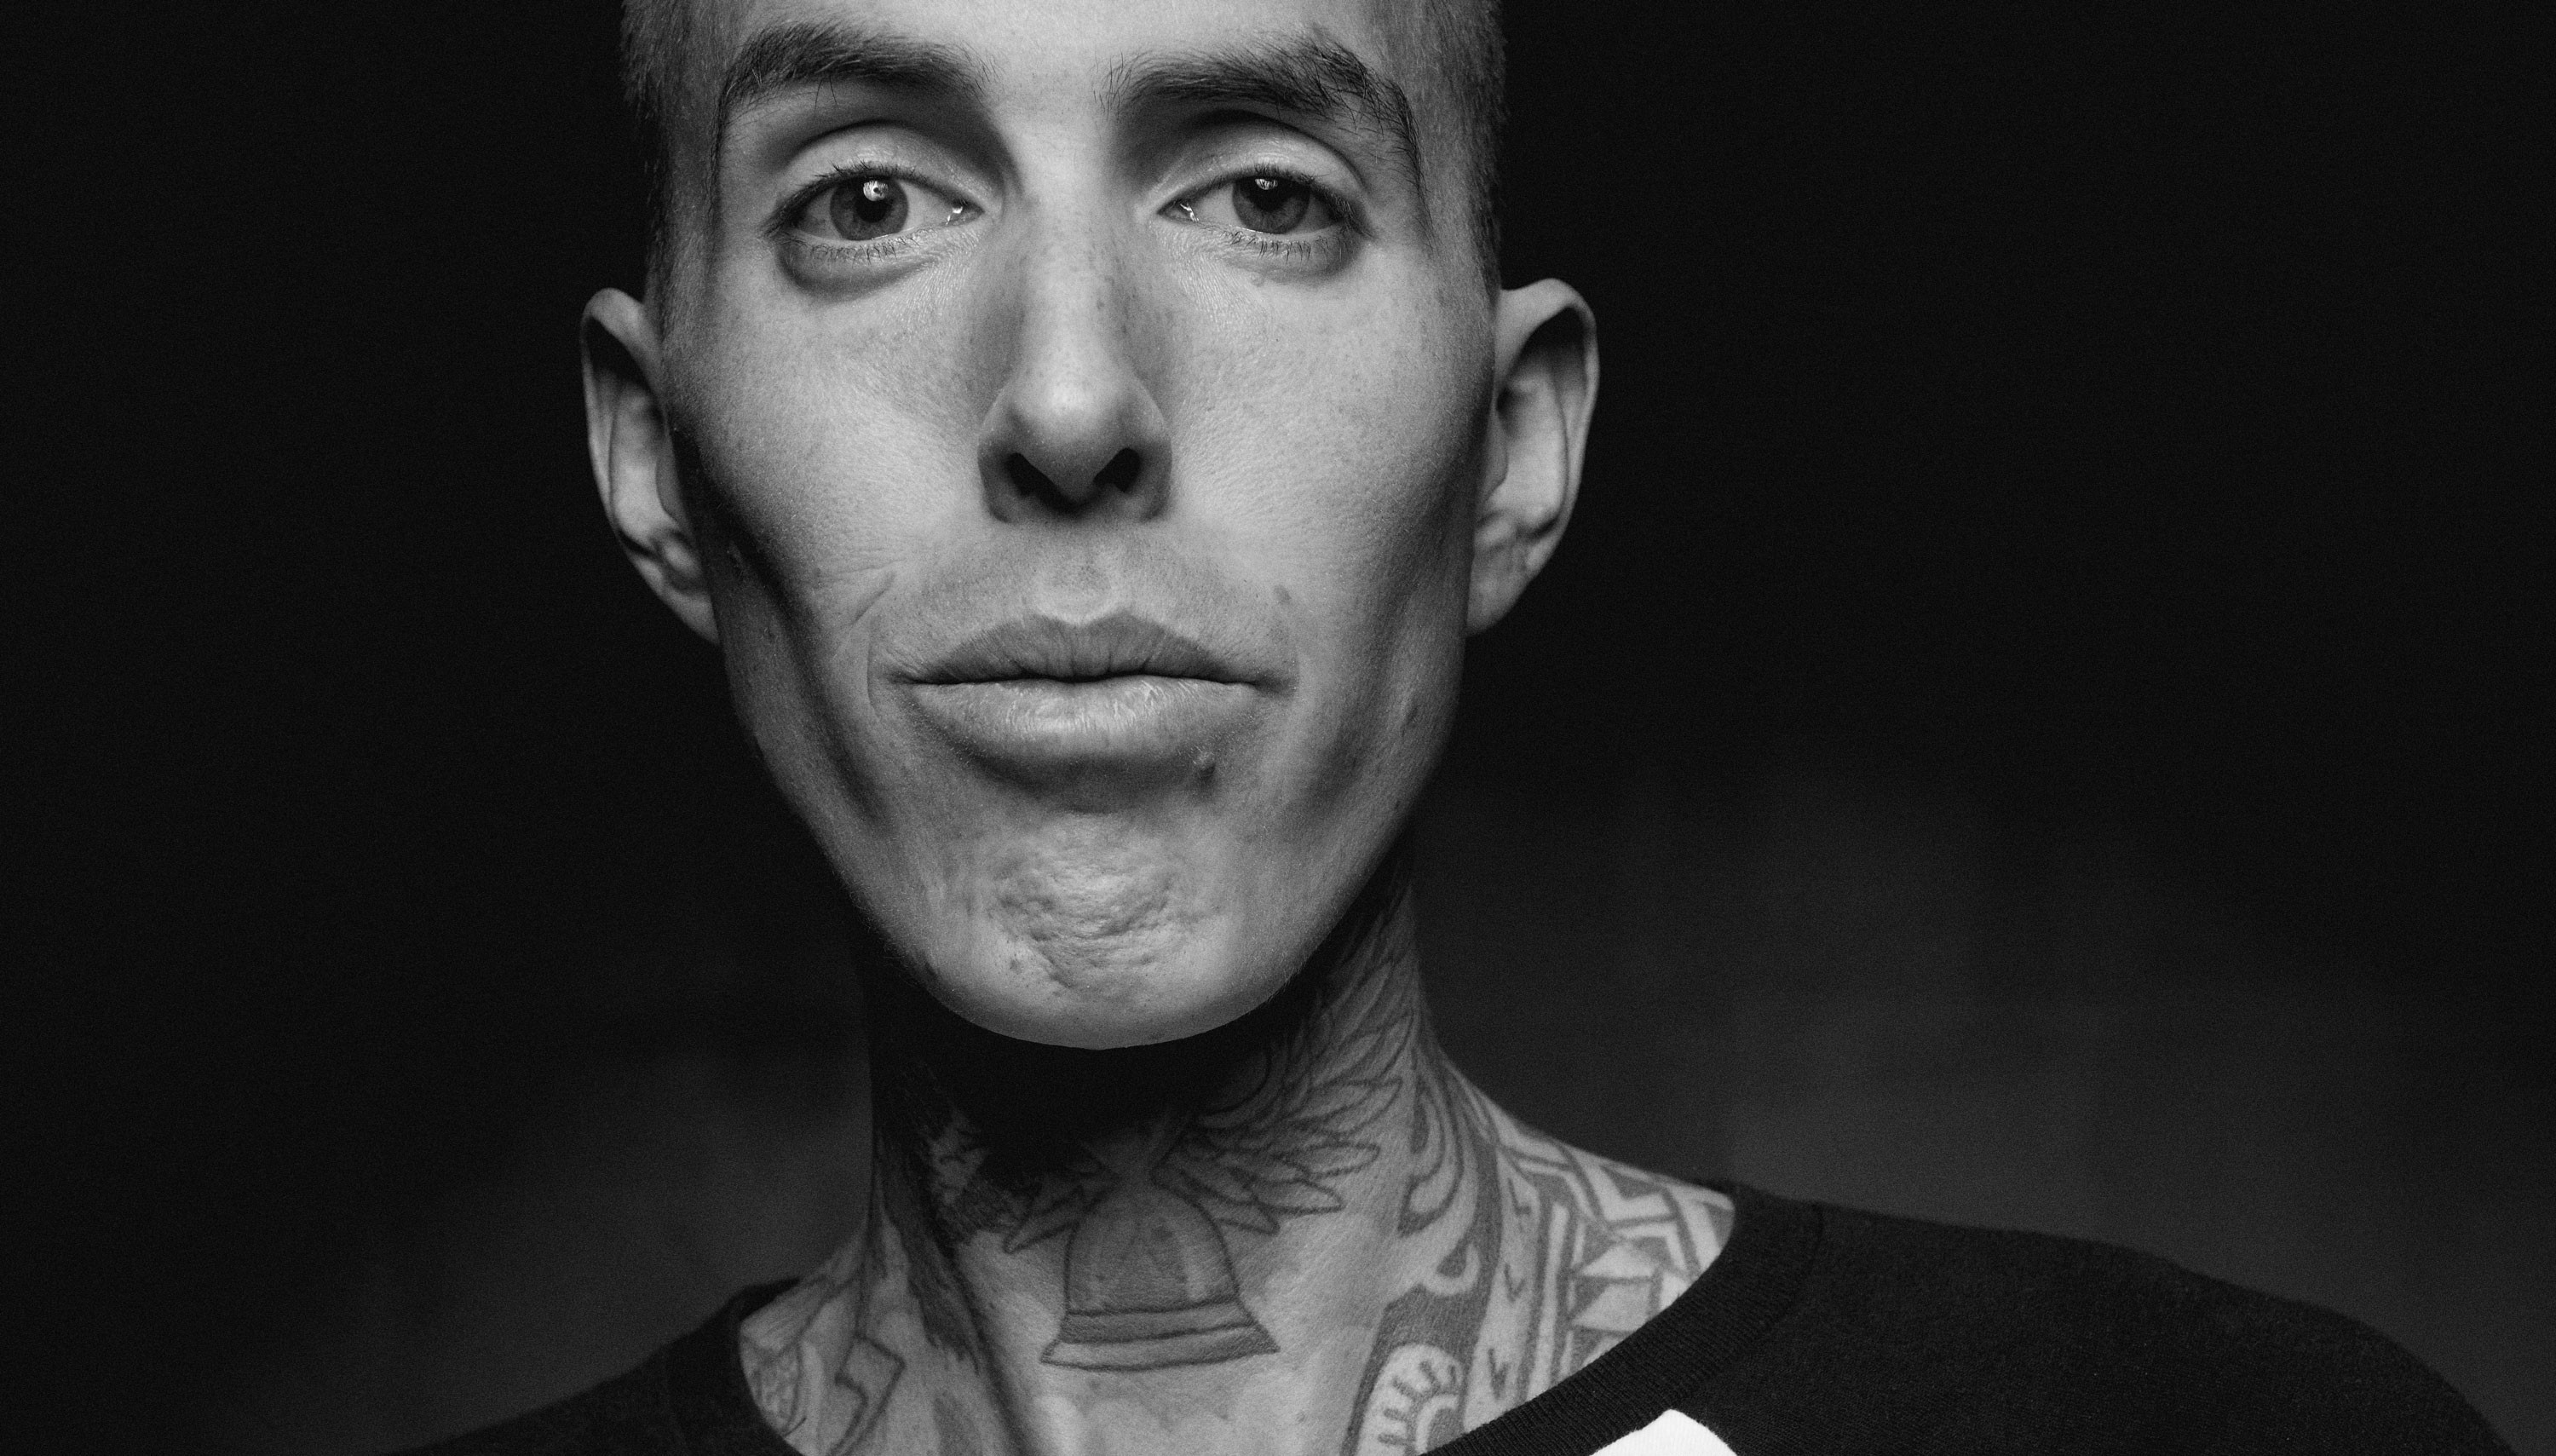
Here we'll make use of the Channel Mixer, which makes it particularly easy to create high contrast and impactful black and whites.
Before / After:
0- Setup
To get started, I used the Spot Healing Brush tool on a new layer with the Sample All Layers option active to remove some of the skin blemishes.
1- Channel Mixer
The channel mixer is an adjustment layer that allows to easily mix the Red, Green and Blue channels to tweak the image’s colors. It also has a monochrome mode to create black and whites.
So go ahead and add a new Channel Mixer adjustment, and thick off the Monochrome checkbox. By default the resulting black and white can look quite flat, but we’ll fix that by tweaking the values for the different color channels. By default Photoshop creates the black and white with a mix of 40% red, 40% green and 40% blue. If you tweaks the red channel you’ll mostly affect the skin tones.
Now the trick is to play around with the channels, but still arrive at a total of 100%. Anything less than 100% and you’ll reduce the overall image’s exposure, and anything over 100% will increase the overall exposure. If your image has the correct exposure to start with, tweaking the channels for a total of over or under 100% will underexpose or overexpose the image.
There’s one exception though, and that’s when using the Constant slider. Constant moves the overall black or white points of the image. For black & whites, this can be really useful because you can lower the black point and then crank up some of the color channels to create a high contrast result. When you adjust the Constant slider, you can then go for a total for the R, G and B channels that takes in consideration the change in constant.
For the purpose of this image, I reduced my Constant to -10%, set the Red channel to +10%, the Green channel to +70% and the Blue channel to +30%. The exact values are highly dependent on your image, so you’ll have to tweak until you find something that looks good to your eye. You’ll notice that our total is +110%, which compensates for the constant that’s set at -10%.

2- Levels Adjustment
Next I used a Levels adjustment layer to add a little bit of gray to the blacks, for a creative effect and to make the blacks less harsh. One trick with Levels is to move the black point to the right a little, but to also make the blacks slightly gray by increasing the black output level. Increasing both of them in tandem makes more of the image black, but makes those blacks gray instead of pure black, which can be a nice effect, especially for a vintage look.
Here I moved my black point to 10, and set my black output to a value of 20. The effect is subtle, but deffinitely noticeable. I could have pushed the values more, but it all comes down the effect you’re trying to achieve.

3- Adding Some Noise
The final touch for this image is adding some noise. Just add a new layer, Shift+Cmd+N Shift+Ctrl+N, select a mode of Soft Light and check to fill it with 50% gray.
Next, go to Filter > Noise > Add Noise, choose a distribution of Gaussian so that the noise is randomized, and monochromatic so it’s black and white. And then just choose an amount that makes sense for the image.
It’s quite easy to overdo it with the noise, but you can always tweak the opacity of the noise layer if needed.

🌄 Image info:
- Camera: Nikon D800
- Focal length: 70mm
- Shutter speed: 250s
- Aperture: f/11
- ISO: 100