Color Grading in Photoshop Using Solid Color Adjustment Layers
Color grading, or color toning, is a technique where a color tint is applied to the highlights and a different one applied to the shadows. This can help give the image a cinematic or vintage look. In fact, if you pay attention, you'll notice that in most movies nowadays shadows have a slight teal tone and highlights or skin tones have a slight orange tone. This helps create an effect that adds drama and dimension to the imagery.
There are many ways to apply color grading to an image in Adobe Photoshop, but one of the easiest is using some simple solid color adjustment layers. The magic is accomplished with a careful selection of the blend modes. Let's go over how it's done shall we!
Before / After:
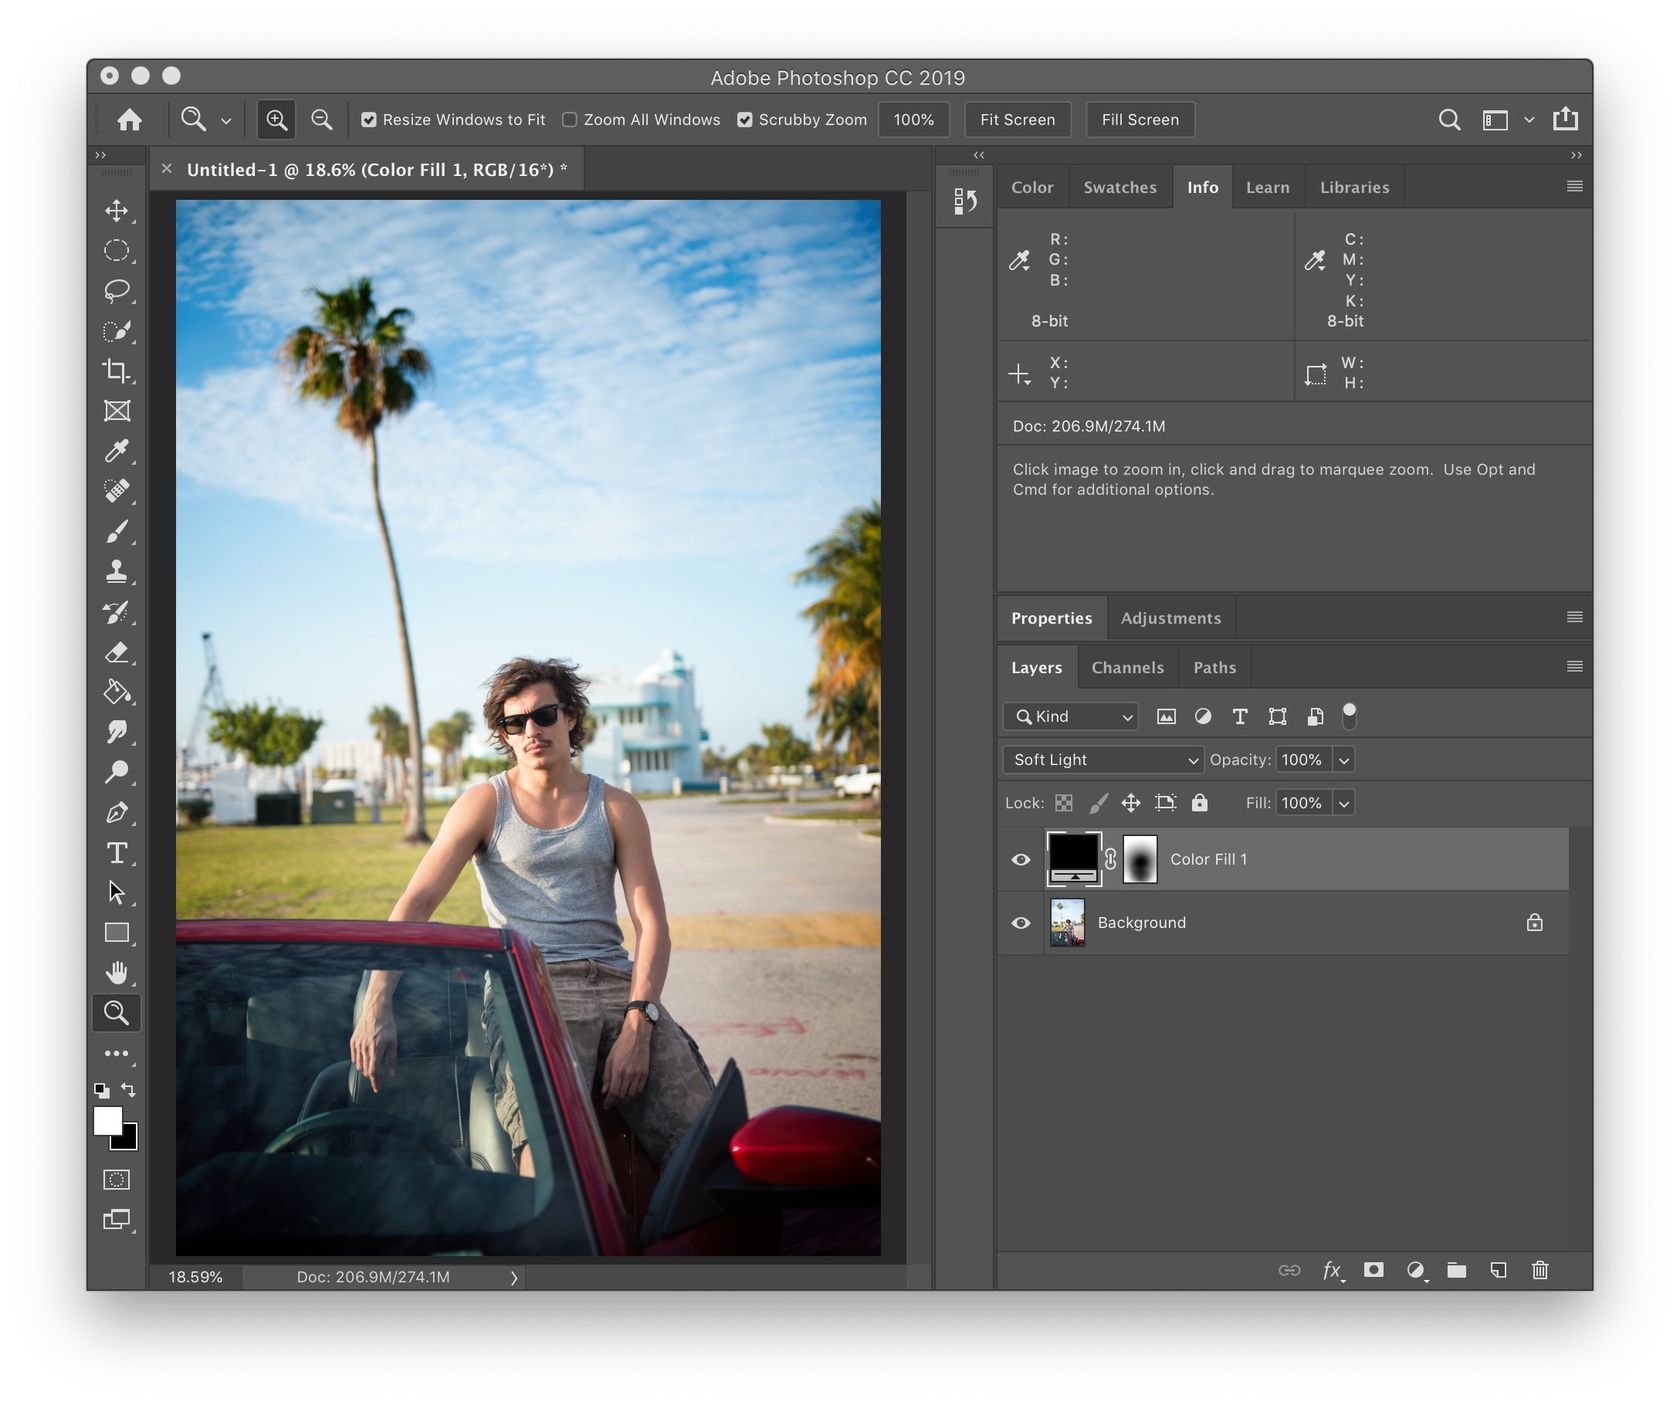
1- Slight Vignette Using Black Solid Color Adjustment
This doesn’t necessarily have anything to do with color toning, but I wanted to apply a slight vignette to the image, and once again the Solid Color adjustment layer comes to the rescue:
- Add a new Solid Color adjustment layer
- Select black as the color
- Change the adjustment layer’s blend mode to something like Soft Light
- Select a large and soft brush and paint black around the center or where the attention should go in the image. This will effectively darken the edges and keep the center bright, for a simple vignette effect.
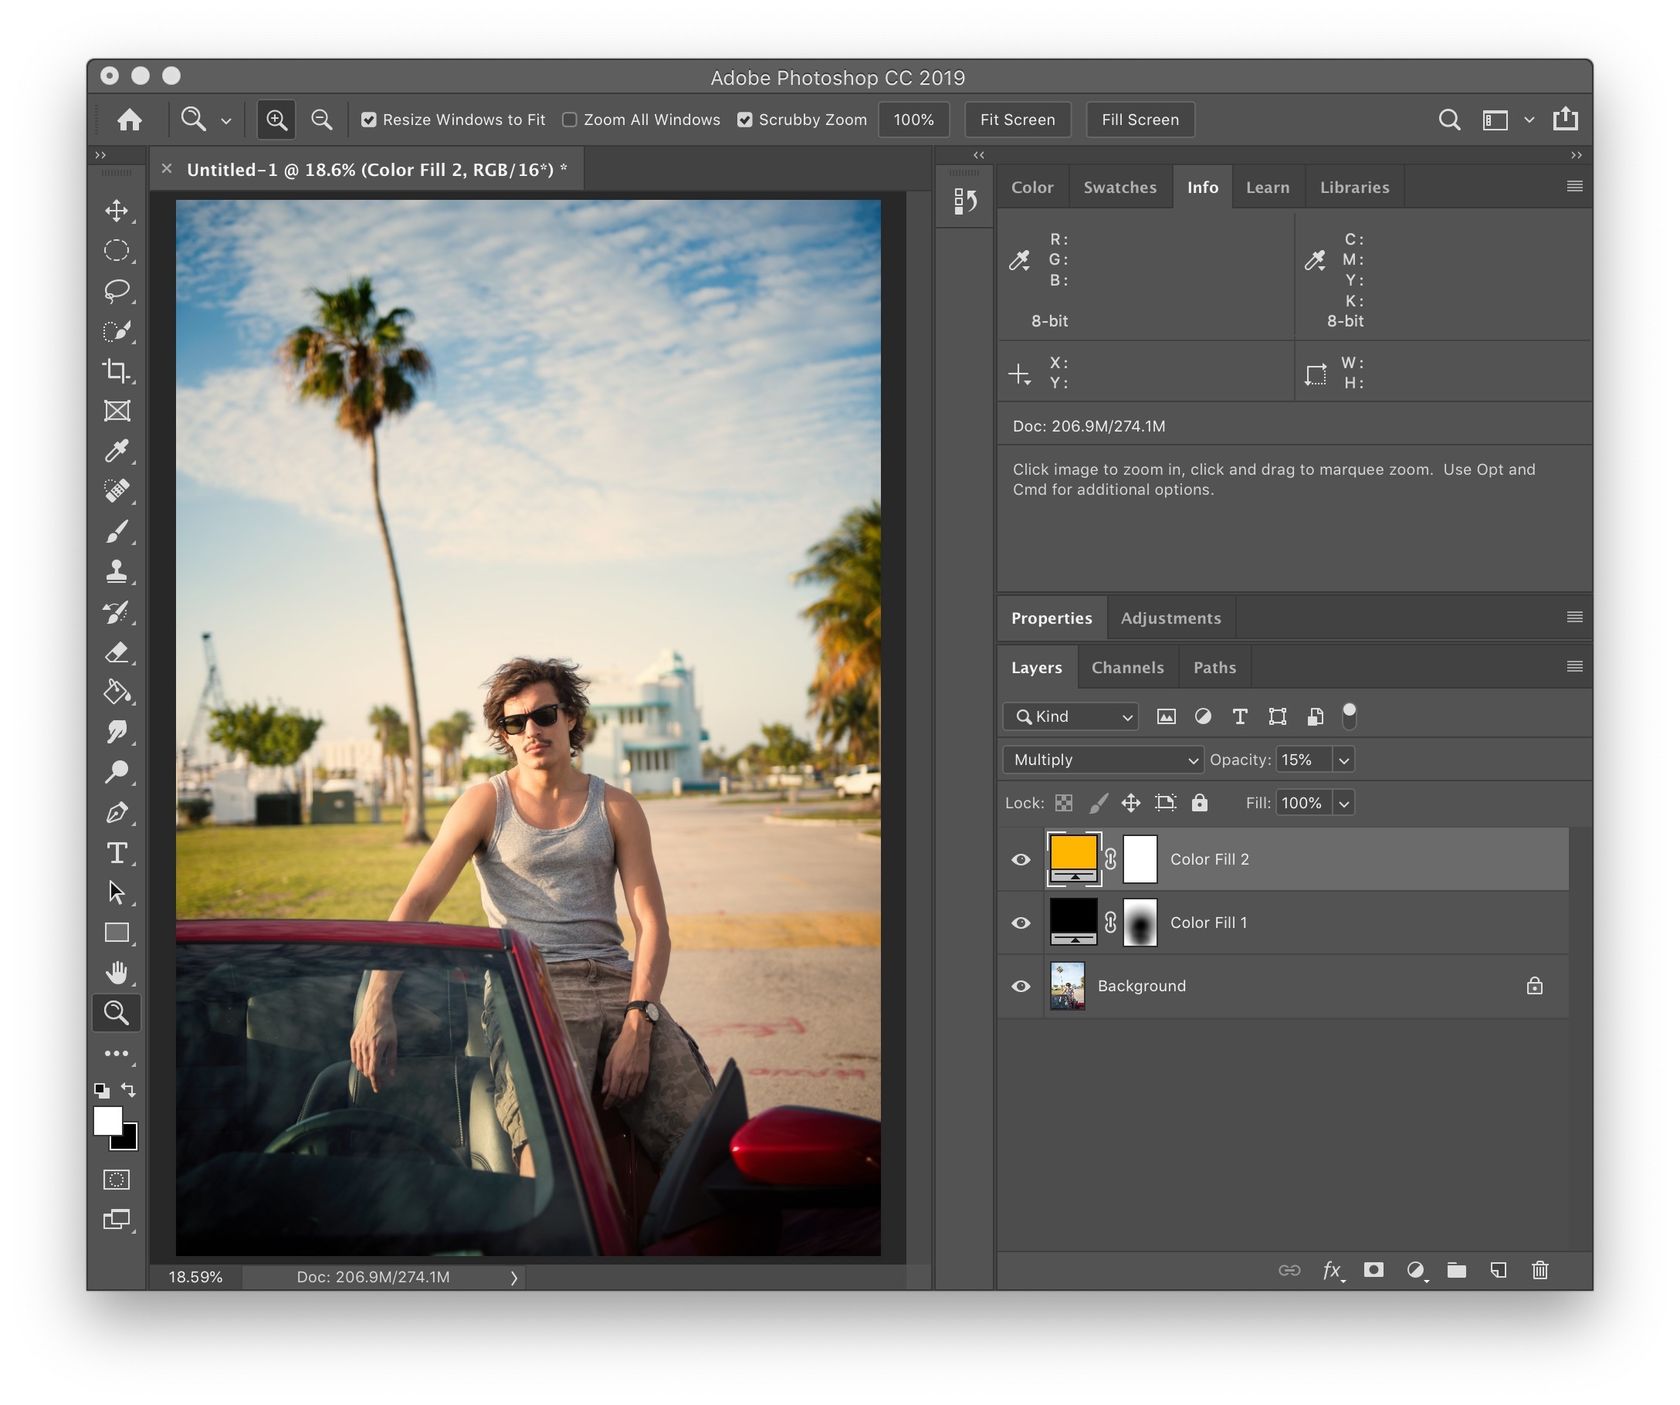
2- Toning Highlights
The secret sauce is to have the highlight adjustment layer set to a blend mode of Multiply. This will make it so that the layer doesn’t have any effect on colors that are darker than the selected color.
- Add a new Solid Color adjustment layer.
- Select a color that looks good for the highlights. Here I selected an orange tone.
- Change the adjustment layer’s blend mode to Multiply.
- Lower the opacity to the desired effect, 15% seemed to work well for my image here.
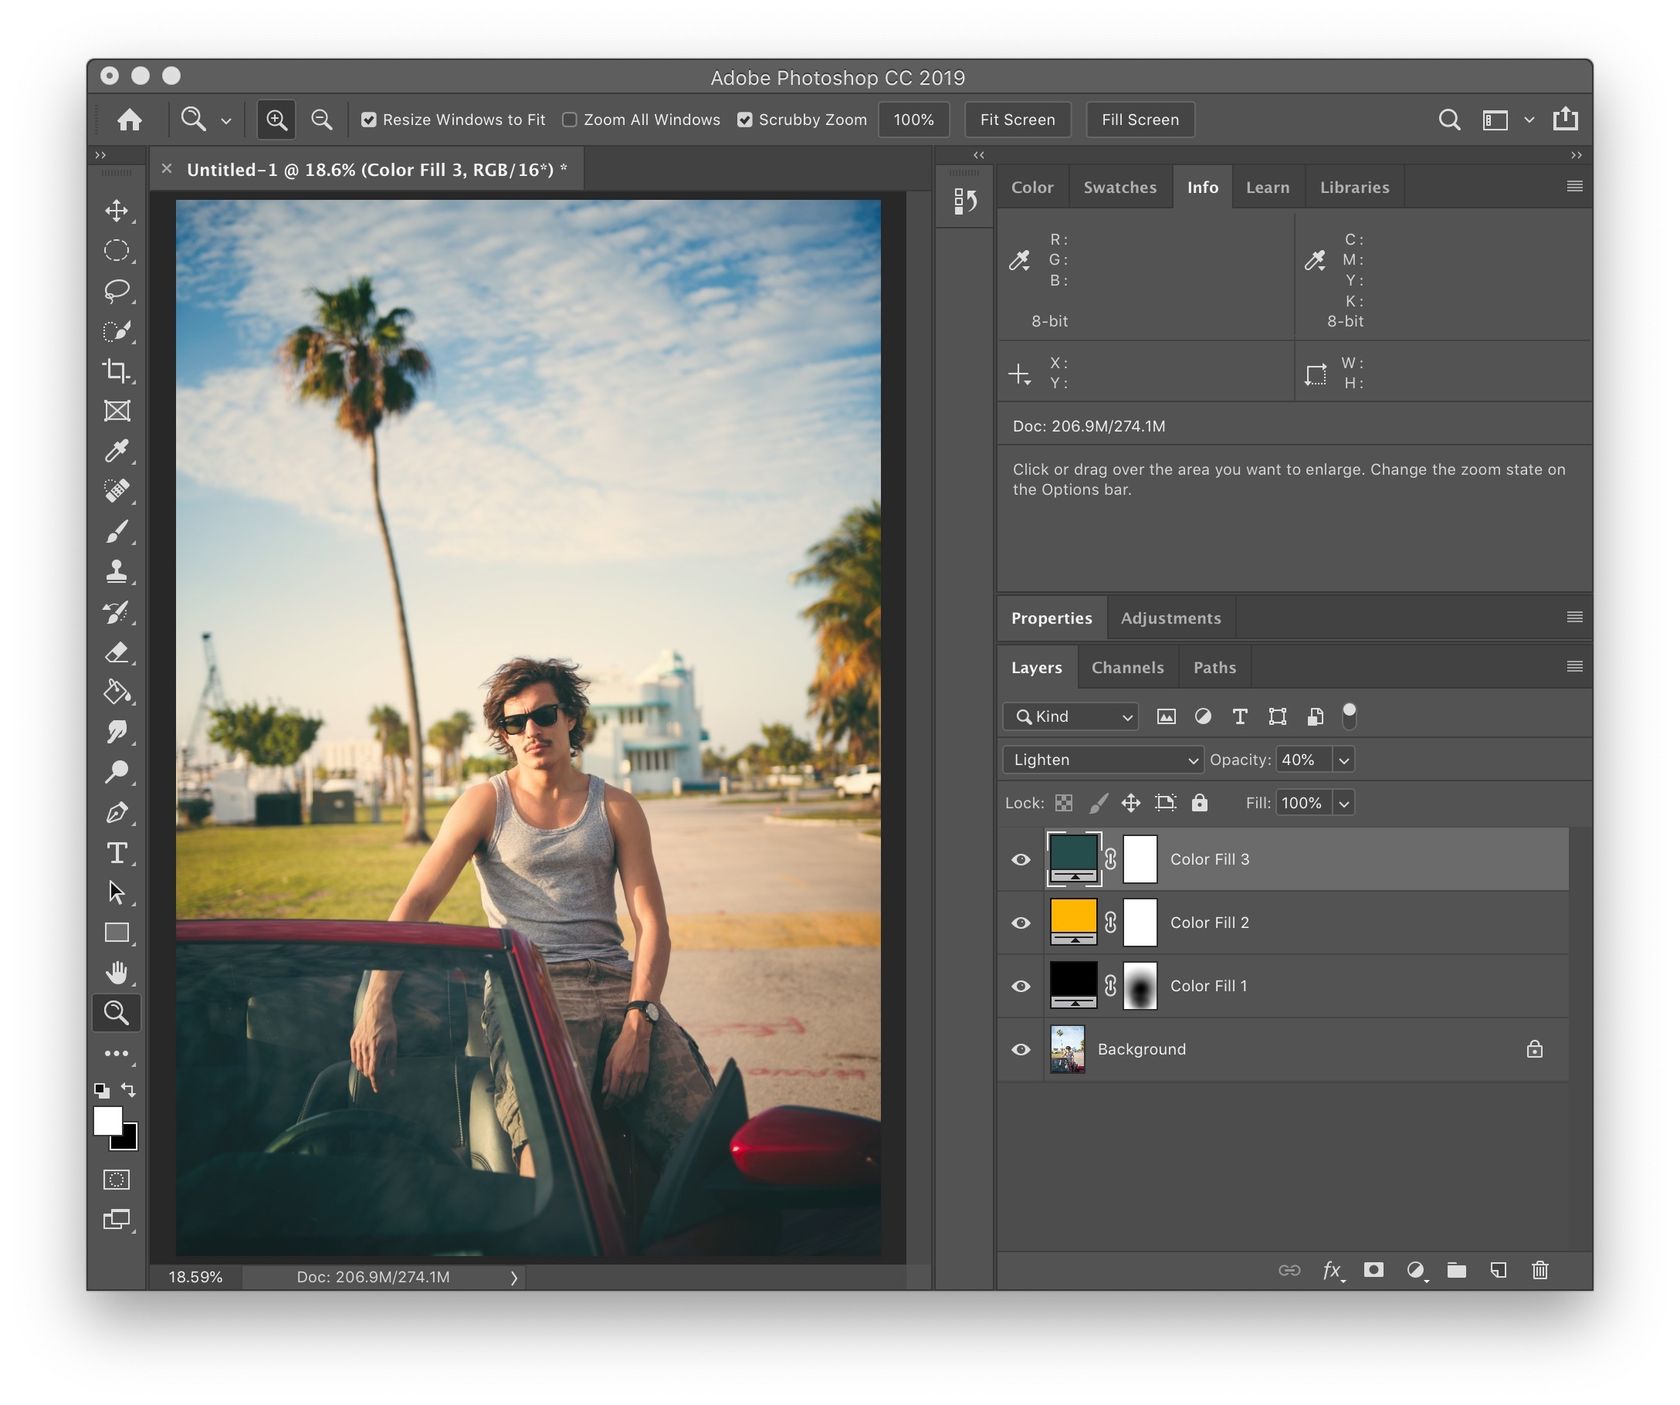
3- Toning Shadows
Here it’s the opposite, we want to set the blend mode for the adjustment layer to Lighten. This will mean that the color will be applied only when it’s lighter than the background color, hence why our dark green/teal will only get applied on the very dark colors.
- Add yet another Solid Color adjustment layer.
- This time though, select a color that looks good for the shadows. Here I actually selected a teal/greenish tone directly from the image from the building that’s in the background.
- Change the adjustment layer’s blend mode to Lighten.
- Lower the opacity to the desired effect, 40% in this case.
Color Choice
The teal/orange combination is used most often, but you don’t have to stick to those colors at all. Blue and green tones can also look great for shadow toning, and yellow or red tones can work great for highlight toning. It’s all about the creative effect and feel you want an image to have in the end.
Wrapping Up
And that’s it, it’s easy as pie really, thanks to the lighten and multiply blend modes!
By default with this technique, we don’t have a whole lot of customization abilities if we want less of our highlights or less of our shadows affected. The lighten and multiply blending modes pretty much do that job for us.
If you want more control, it’s pretty easy to tweak things using Blend If, which can be found in the layer’s blending options when you double click on a layer. We’ll cover Photoshop’s Blend If feature in a future post.
🌄 Image info:
- Camera: Nikon D800
- Focal length: 48mm
- Shutter speed: 1/1000s
- Aperture: f/2.8
- ISO: 160


