How to Make Your Own Homemade Foldable V-Flats
V-flats are an indispensable tool for a photography studio. They consist of two large pieces of foam core (usually 4 foot by 8 foot) tapped together at one of the long edges to form a V. Ideally the form core is black on one side and white on the other size. They can then stand on their own and act as a giant reflector, a giant flag, or can even be used as a white or black background.
It’s pretty easy and straightforward to purchase two large pieces of foam core at a craft of hardware store and stick them together with gaffers tape. The problem though is that the size needed for the foam core doesn’t fit in a normal-sized car, and then the v-flat itself is not portable. Plus, it ends up taking a lot of space in a studio, so if you have a small studio space it might not be practical.
So a solution would be foldable v-flats. Fortunately for us, a company called V-Flat world came up with a product that does just that. If, like me, you’re on a pretty tight budget, there’s also another solution: homemade foldable v-flats.
They are pretty easy an straightforward to make at home with a minimum of supplies.
Let me quickly breakdown some of the highlights of the steps I used to build a portable v-flat:
Material Needed
I decided not to glue the gaffers tape to the form core boards. I’m confident that the gaffers tape alone will be strong enough to hold. That means no need for extra glue. Here’s the breakdown of what I used:
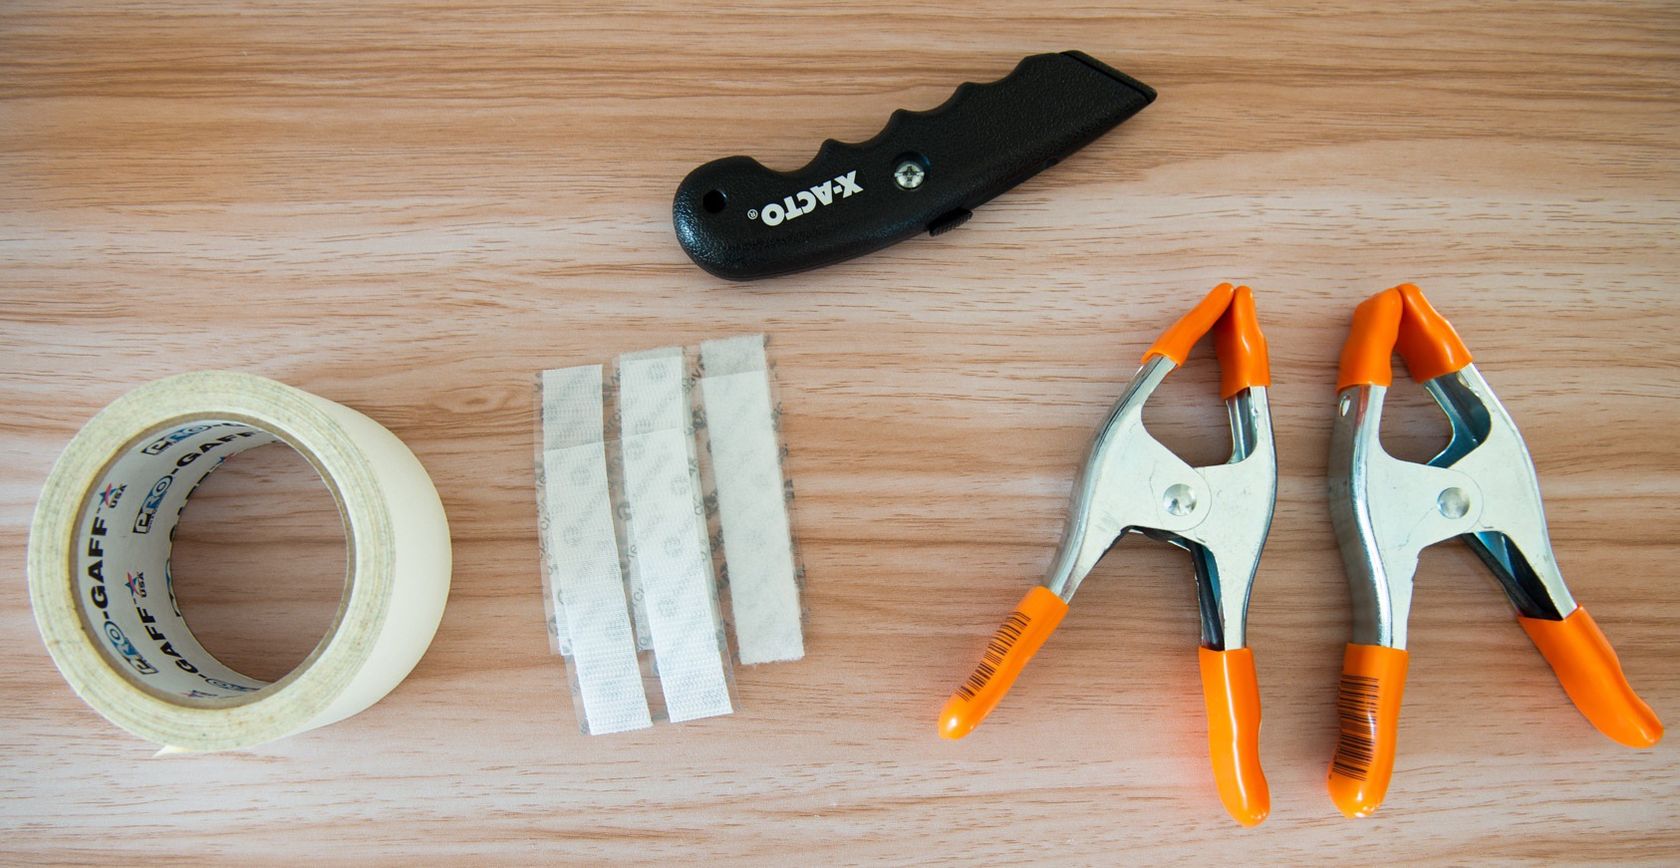
- 4 pieces of 32” x 40” white foam core
- White gaffers tape
- 2 A-Clamps
- 1 box cutter
- A few pieces of velcro bands
You can get all of that easily at pretty much any craft store. Note that normally a true v-flat has a white side an a black side, so that white can be used to reflect light or as a white background and the black side can be used to block light or to create negative fill. One problem though with our foldable version is that the tape used will be visible on both sides, meaning that the color of tape you use will show. What I’ve decided to do to go around that is build an all-white v-flat using white gaffers tape and then build another, all-black one using black gaffers tape.
Now let’s go onto actually putting the v-flat together…
1- Sticking the First Pieces Together
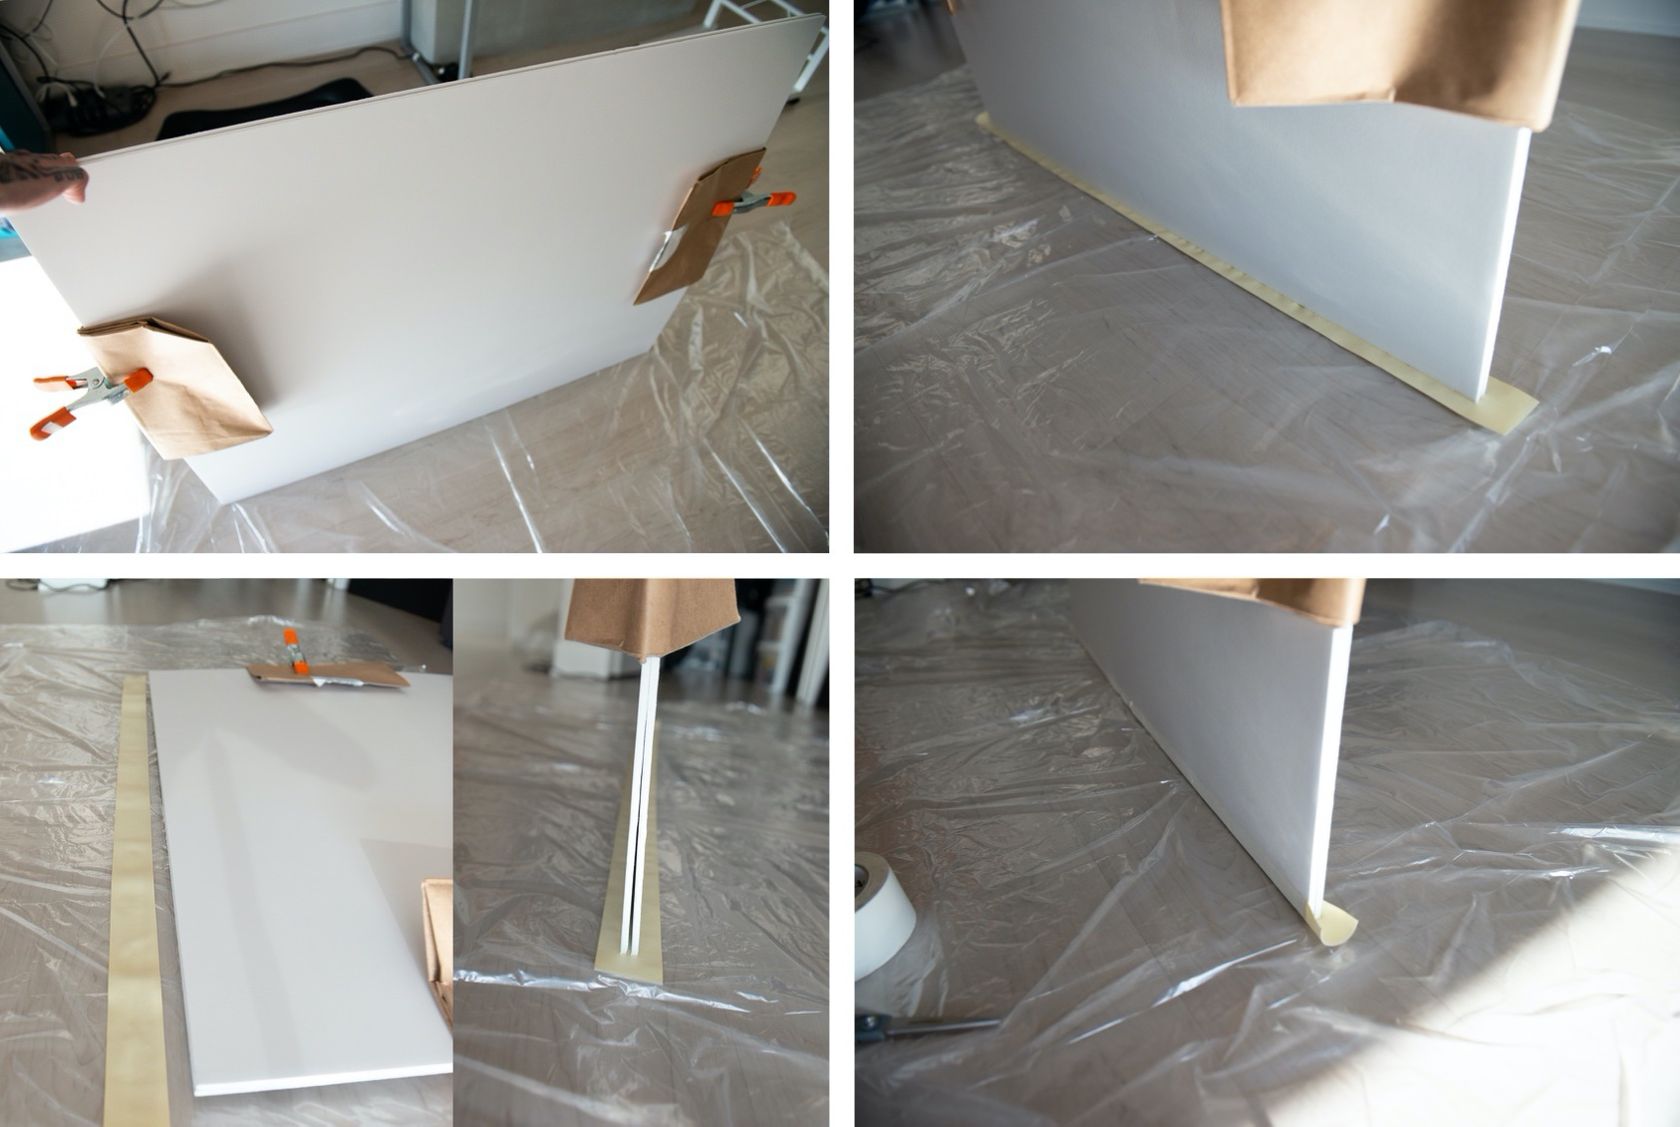
- Put together two pieces of foam core so the the edges on the long side meet. Here, like in the video, I used A-Clamps with some cardboard to hold them together while avoiding damaging the foam core.
- Use a strip of gaffers tape that’s maybe about 1-inch longer than the edge of the foam core on either side and place the foam core edge in the middle of the band of tape.
- Then gently secure the tape on either side.
As for the ends of the tape, I once again followed what they did in the video and cut the tape at an angle. Then with the box cutters I cut where the boards meet so that it can be opened:
Now flip the boards over, flatten out the tape with your fingers, and add another strip of tape on that side:
Now we have the bottom half of the v-flat completed.
Top Panels
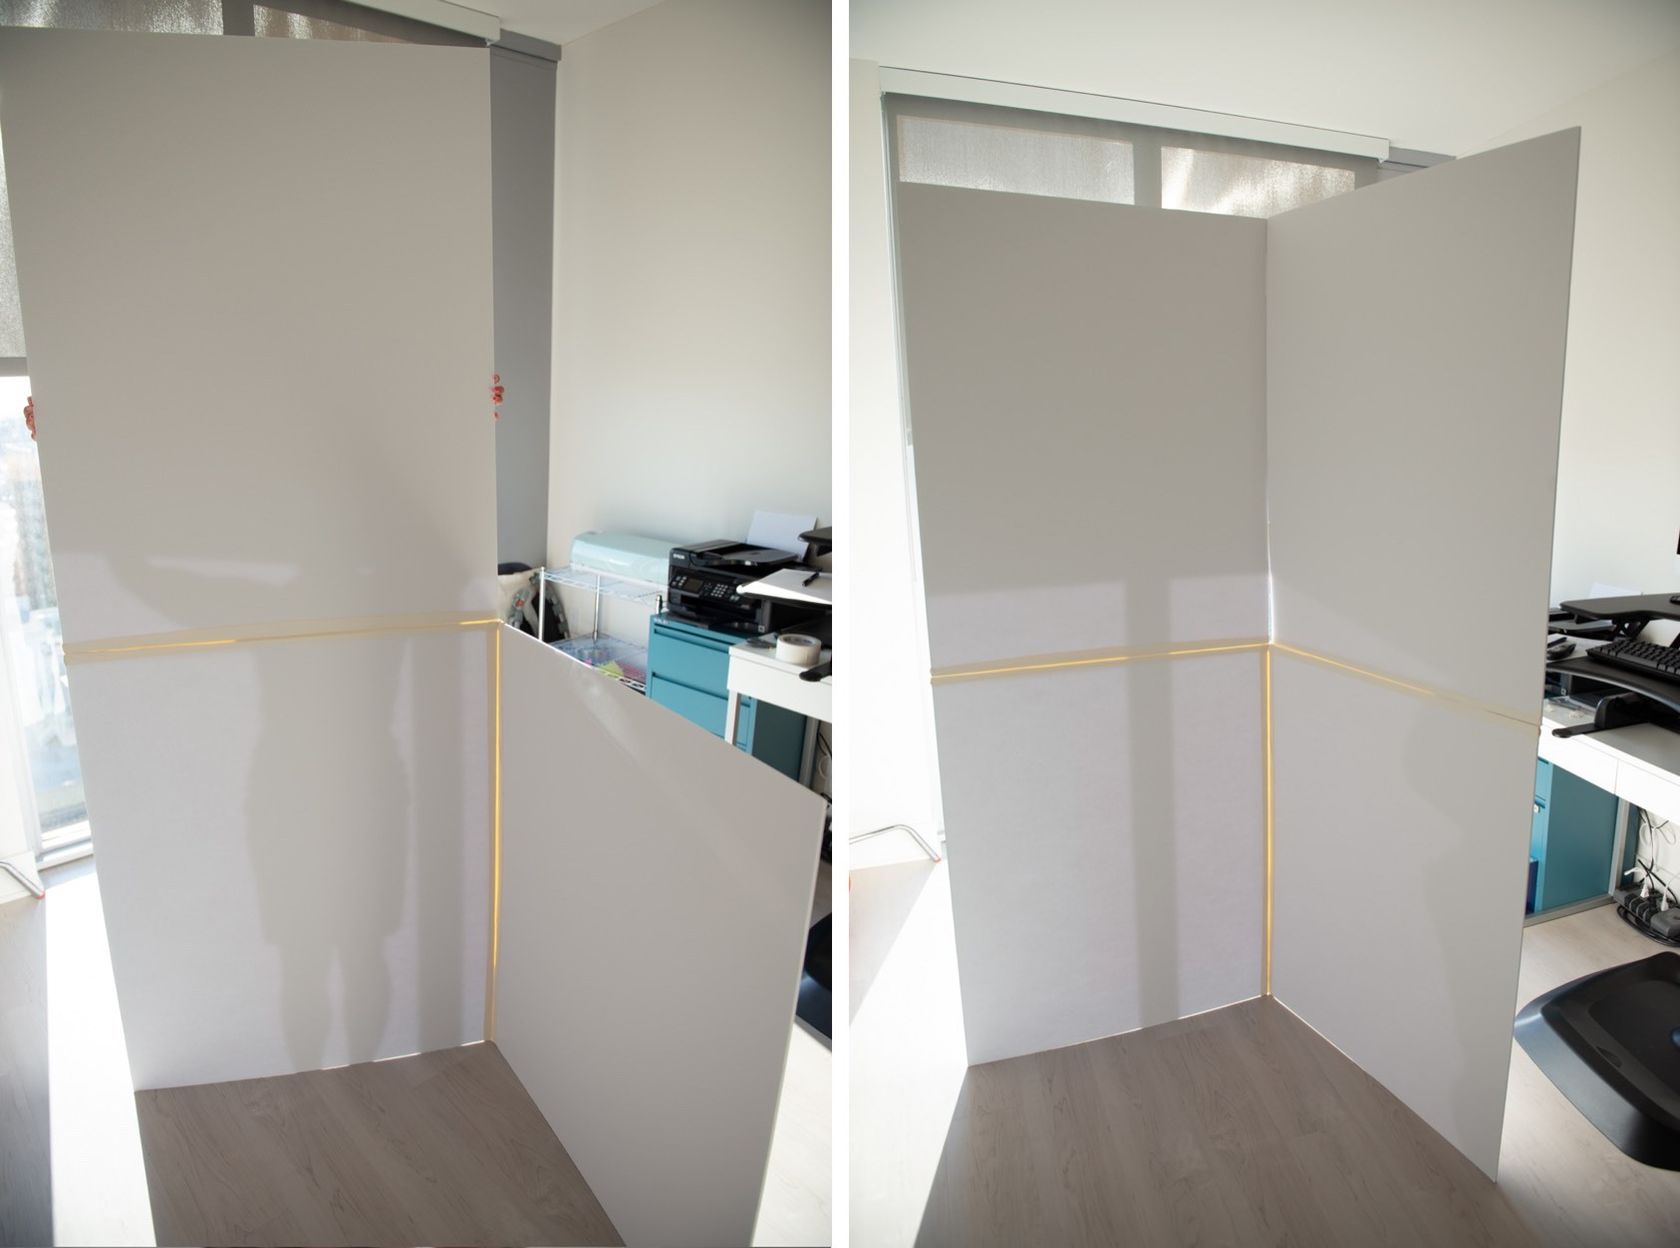
For the top panels, repeat the steps of taping on both side where the pieces of foam core meet and cutting the edges of the tape an an angle to create a neat closed-out edge:
Velcro
It’s now time to install some velcro between the two top panels. For this, I stuck two strips of velcro band, one near the top of the top panels and one near the bottom:
Done! We now have a foldable v-flat that closes down to 32” X 40”.
Closing thoughts
As you saw, it’s pretty easy to create your own portable and foldable v-flats on a budget. The result is great and will take a minimum of space in your studio. Compared to an actual v-flat thought, there are more seams and the seam in the middle may not be as tightly closed. So if you use it as a background you’ll have to retouch out the seams, which shouldn’t be too much of a problem.


