A Primer to Tethered Shooting in Lightroom or Capture One
Impressed by those fancy videos of photographers shooting and seeing the shots in real time on their computer? It’s called tethered shooting, and you can do it too with minimal equipment and setup. This is meant to be a short guide to help you do just that!
Why Shoot Tethered?
If you’re reading this post, you may already be convinced about the benefits, or shooting tethered. If that’s the case, you can skip ahead to the next section.
If, on the other hand, you’re not sure if shooting tethered is worth the extra expenses and setup, here are a few things that shooting tethered can do for you:
- Instant feedback for you as a photographer to really see the images and be able to tell if the lighting, posing or any other aspect needs tweaking.
- Allows clients or the rest of the team to also see the pictures as they are shot. This could help a makeup artist see areas of the makeup that would need some touch-ups, for example.
- No need to download your photos from a memory card after the shoot, they’ll already be uploaded where they need to be.
- You can set things up so that a backup of your shots gets created on the fly to a separated hard drive. I’ll cover doing this in a different post.
- You can apply presets and edits, and have those automatically applied to subsequent shots, so that you see the shots as close to the final look you’re looking for as possible.
- Your model will also be able to see the shots in real time and get a better idea for the feel/mood of the images as well as instant feedback about whether the posing is working or needs some tweaking.
For me personally, when shooting in studio, I now find that shooting tethered is a must and helps both me and the model get at a great shot much faster. The only downside really is the extra cable that runs between the camera and computer, but that’s something that I quickly got used to.
What You’ll Need
You’ll likely need one or two additional pieces of equipment in order to shoot tethered, at a minimum. But don’t worry, it won’t set you off by too much.
The most popular supplier of the gear you’ll need is called Tether Tools, and that’s the company I recommend buying from for your tethering needs.
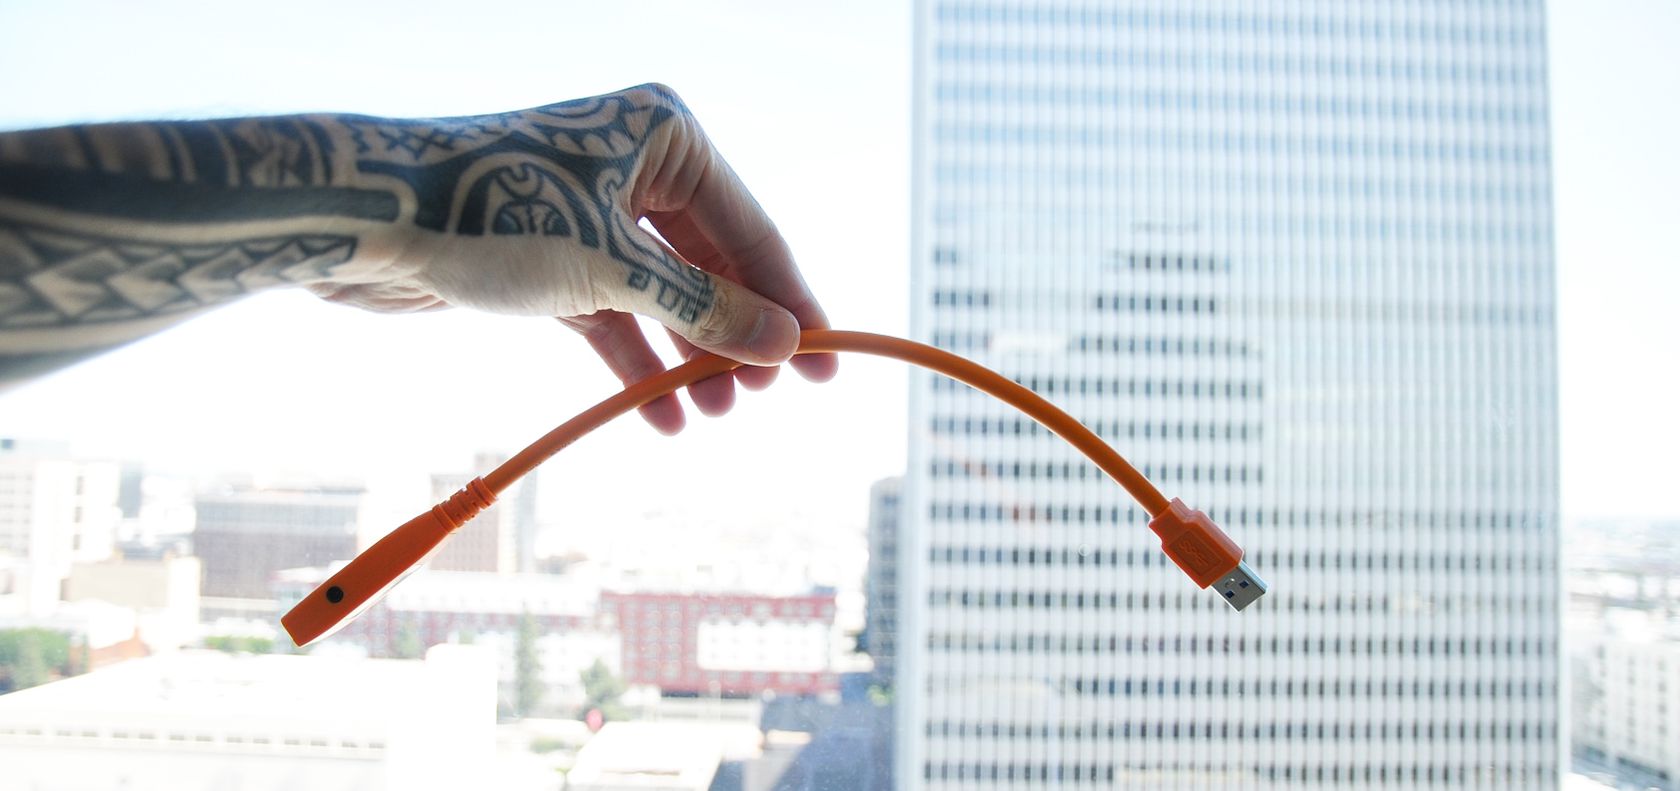
The single most important piece of equipment you’ll need is a tethering cable. Your camera most likely came with one, but it’ll most likely be short and not as high-quality as a cable you’d get from a company like Tether Tools.
For your 1st tethering cable, I recommend you get the starter kit from Tether Tools. The page will guide you through choosing the right cable for your specific camera, and on top of the cable you’ll also get some useful extras like cable ties, and jerk stoppers which help prevent strain on the connectors or accidentally pulling the cable out.
You’ll see in videos that many photographers use the orange cable, and the reason for this is so that it’s easy to see and that people are less prone to trip in the cable.
Tether Boost
The next piece you might need is something like the TetherBoost from Tether Tools. If you start off without it and find that your tethered connection gets lost for no apparent reason, or you struggle to get a connection in the first place, the TetherBoost should fix those issues!
What happens is that on many computers today the USB is slightly underpowered and the strength of the signal gets lost along the way. This is especially true when you start shooting with longer tethering cables.

So in summary, you’ll need:
- A good high-quality tethering cable (15 feet is ideal to start) with connections that match your specific camera and computer/laptop. If you go with a starter kit, you’ll get the cable and some helpful extras with it.
- A TetherBoost if you find that you have connectivity or lost signal issues.
Shooting Tethered Into Lightroom
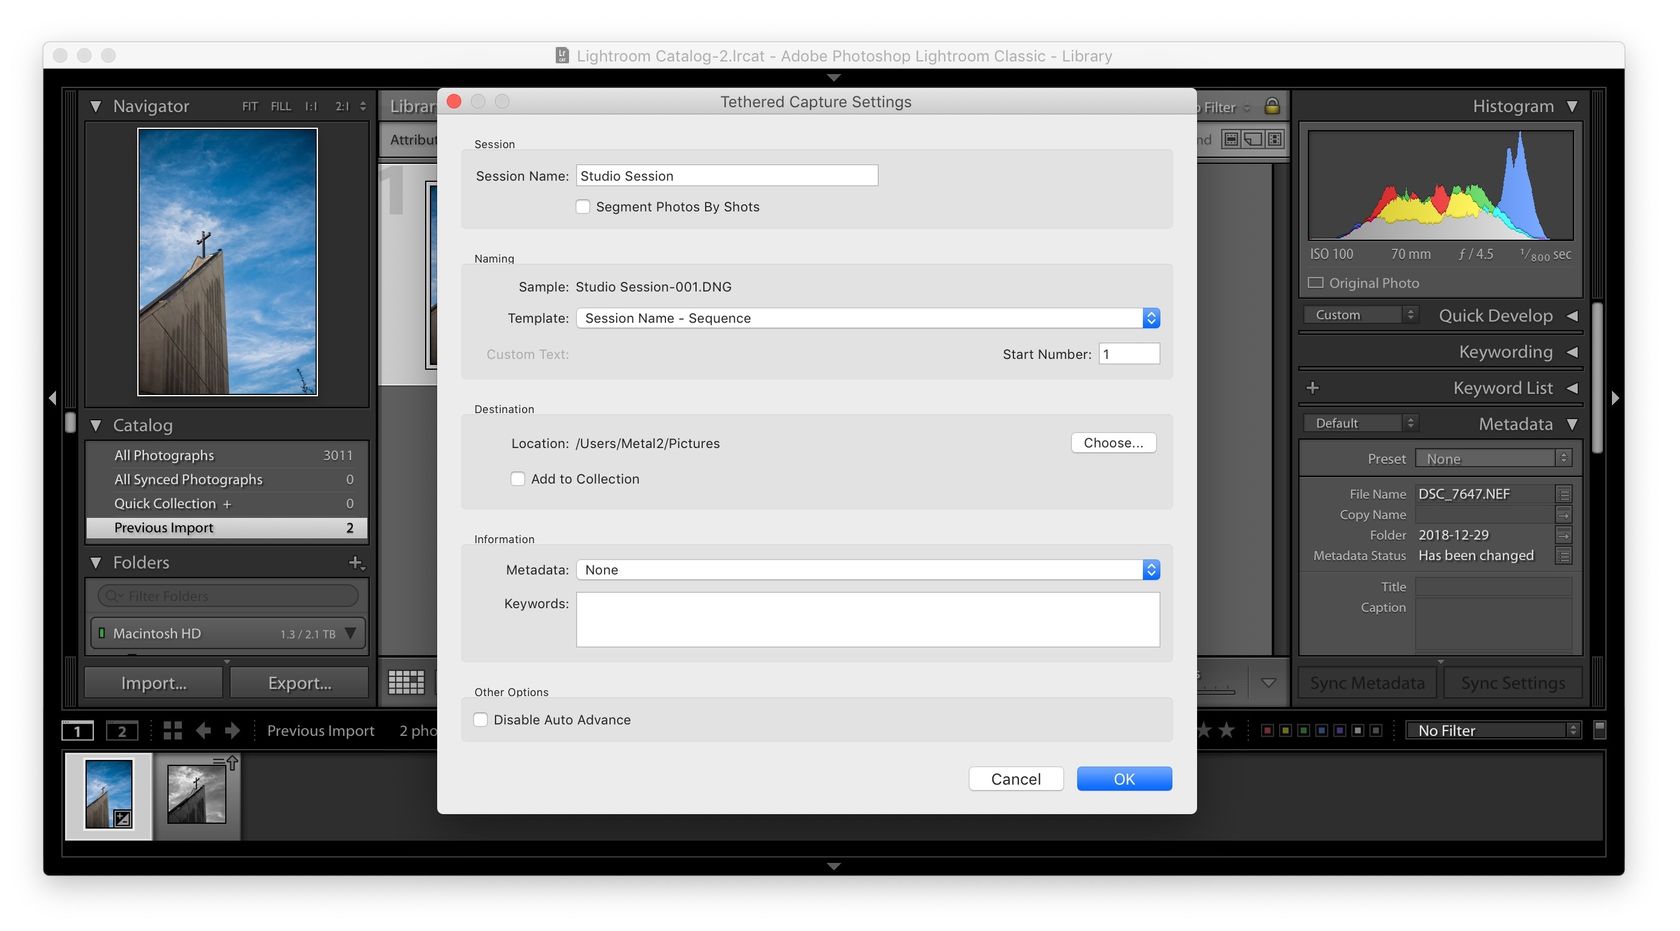
Just connect you tethering cable to your camera and your computer, and in Lightroom head over to File > Tethered Capture > Start Tethered Capture…

Once you set the settings for file naming and where the captures should go, click Ok and Lightroom will automatically detect your camera and you’ll see a new widget appear on screen that shows your camera settings and allows you to trigger a shot. From that widget, you can also specify develop settings to apply automatically to captures.
And now you can start shooting and you’ll see your shots appear automatically inside of Lightroom!
Shooting Tethered Into Capture One
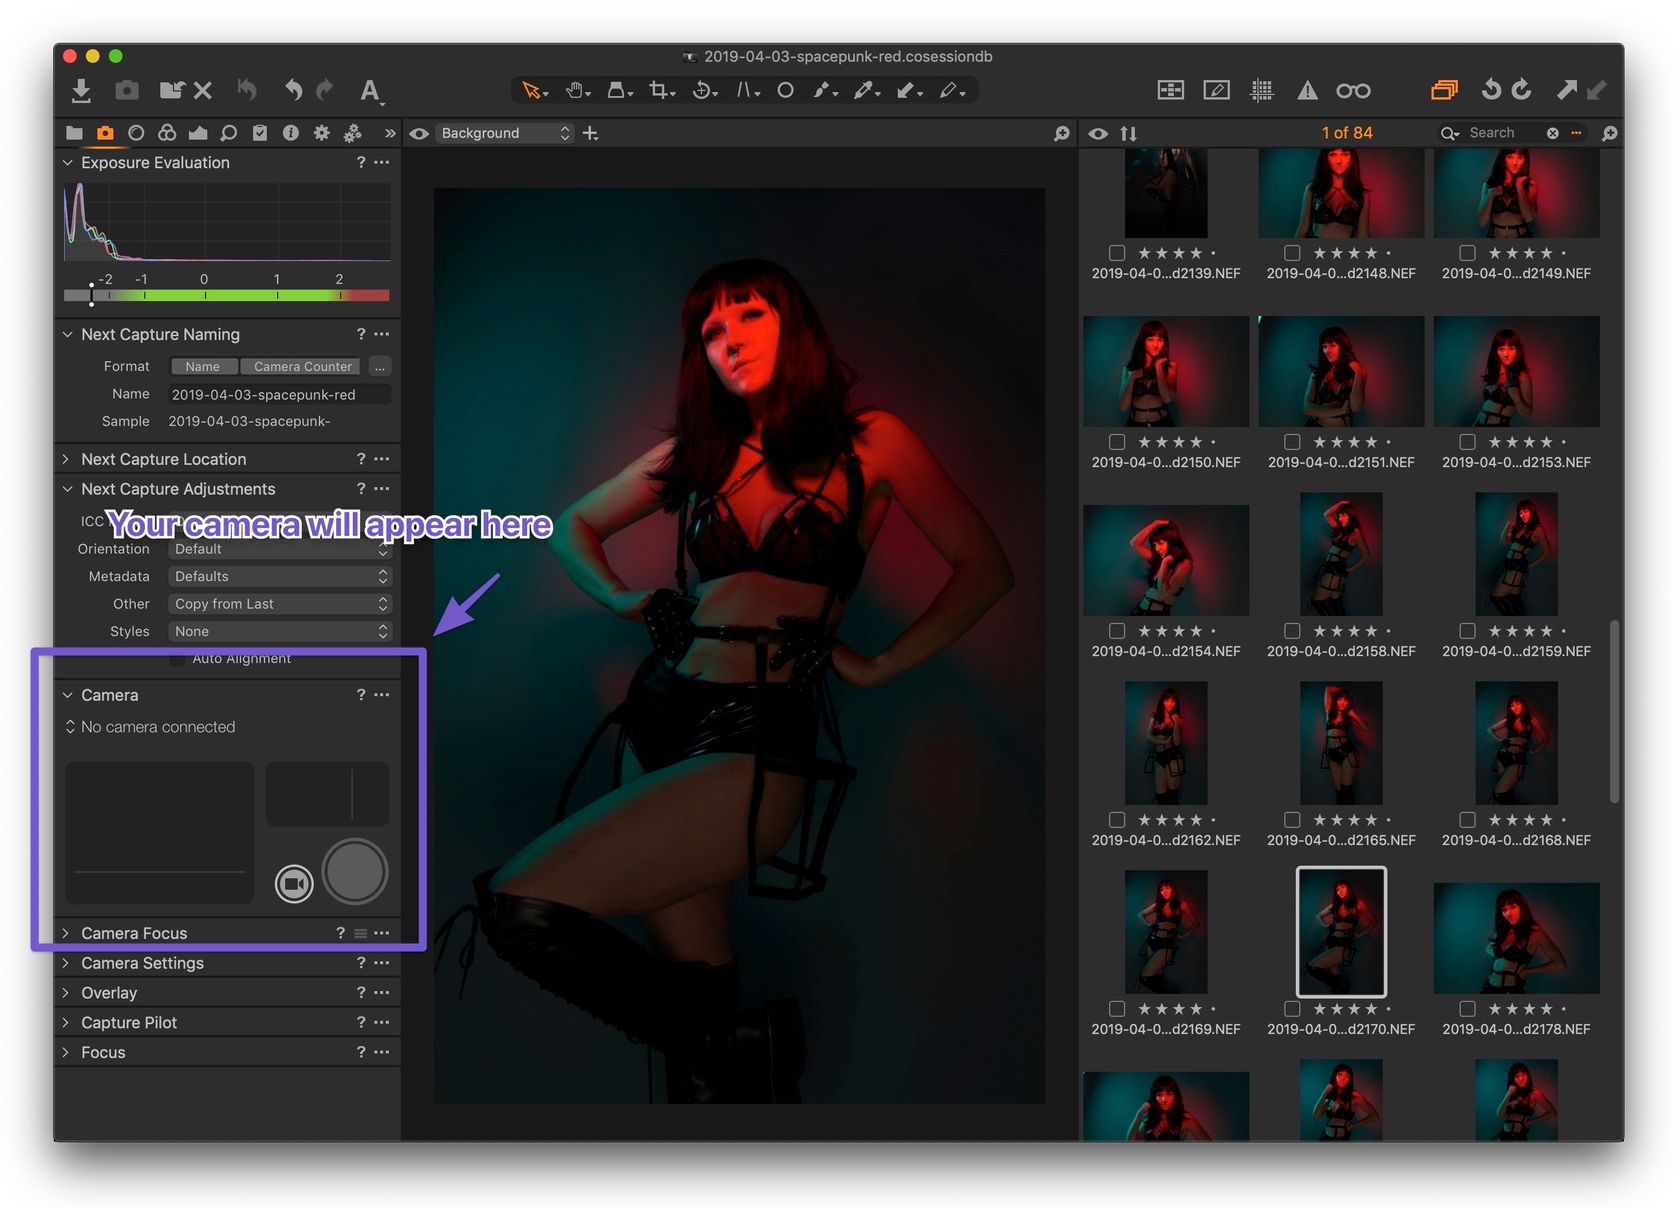
Capture One has been built with tethered shooting in mind, so it’s naturally very easy to start shooting tethered without any special setup. Just plug the tethering cable to your computer and camera, power-on your camera, and head over to the Capture tab. You’ll see a camera panel on there and your camera make, model and current settings should automatically appear:

You can now start shooting and you’ll automatically see the shots appear in Capture One. Under that same camera panel, you even have a button to trigger a shot directly from Capture One, which can be useful especially with product photography.
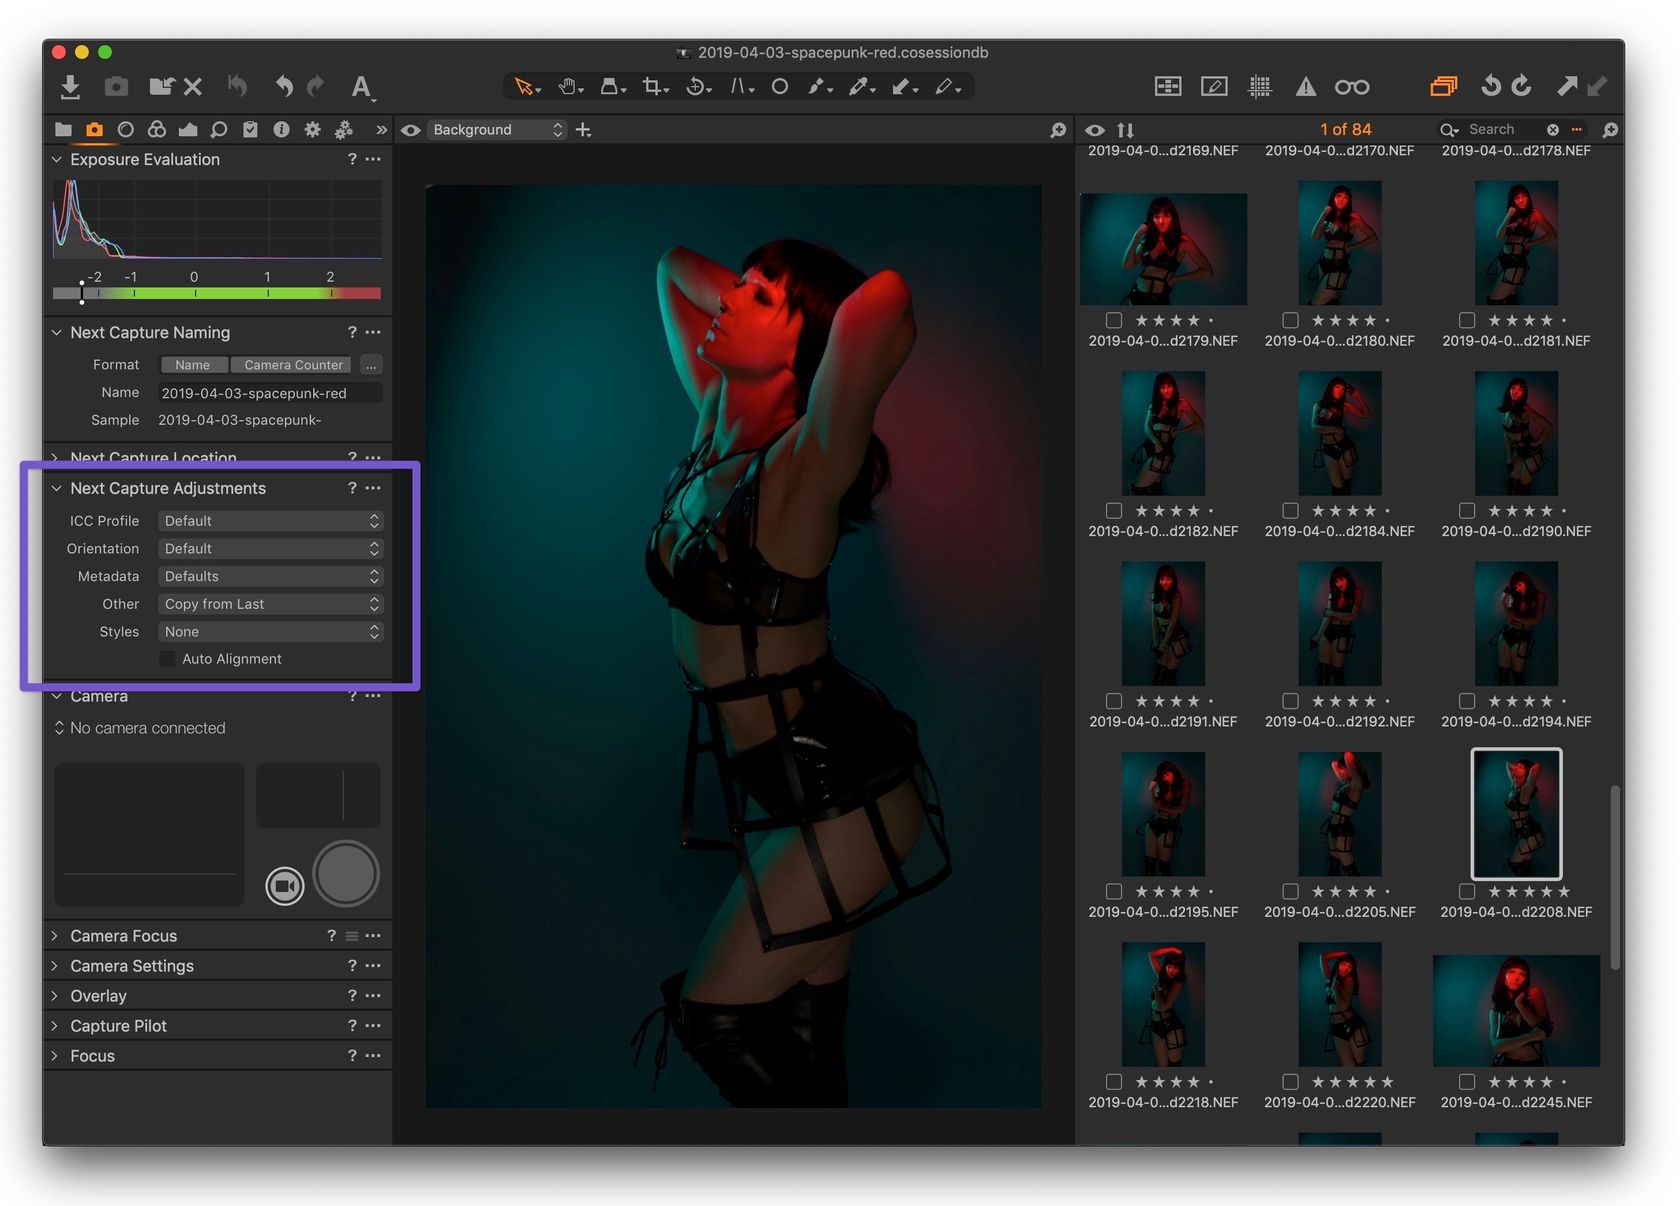
By default, the edits applied to the last shot will be automatically applied to the next shots. This is one of the handiest features and allows to create adjustments on the fly and see it on all the shots. You can change the behavior under the Next Capture Adjustments tool from the Capture tab.

✨ And there you have it! You should now have the knowledge needed to start shooting tethered and reap the benefits.